
Learn How to Properly Size a Bicycle With Key Measurements
This post contains affiliate links. As an Amazon Associate, we earn from qualifying purchases.
How to properly size a bicycle requires matching three critical body-to-frame measurements: standover height clearance (at least two inches for paved surfaces, per Giant’s manual), saddle height relative to pedal stroke, and reach to the handlebars. Missing any one of these sets you up for discomfort at best and a preventable crash at worst. The numbers are non-negotiable, and they come straight from manufacturer manuals and international safety standards like ISO 4210-2.
Those three numbers form a tripod of stability, control, and efficiency. Get one wrong, and the whole system wobbles. This guide walks through each measurement, the tools you need (a tape measure, a level, and a friend), and what happens when you ignore the specs printed in the owner’s manual.
What follows: the specific clearance numbers for road, mountain, and city bikes; how to measure your effective top tube reach; and the one “break-in period” adjustment every new bike needs within its first month. By the end, you’ll be able to walk into any shop and know if a bike fits before you even throw a leg over it.
Key Takeaways
- Standover clearance is safety, not comfort. On pavement you need a minimum of two inches (5 cm) between you and the top tube when standing flat-footed, according to Giant’s manual. Off-road, that jumps to four inches (10 cm).
- Saddle height drives knee health. Set it so your leg is almost straight at the bottom of the pedal stroke with your heel on the pedal. A seat too low or high stresses tendons within 50 miles.
- Reach is about control, not stretch. Your effective top tube length should let you bend your elbows slightly when gripping the hoods. A too-long reach forces locked arms and numb hands on descents.
- Bikes have a “break-in” period. Cables stretch and spokes settle in the first 30 days or 10-15 hours of riding, changing your fit. Plan for a post-purchase tune-up.
- ISO 4210-2 is the rulebook. This international standard defines safety requirements, including minimum saddle heights and brake-lever clearances that directly affect what size bike you can physically ride.
The 3 Critical Numbers You Can’t Afford to Miss
Forget “feeling” if a bike fits. Your body works on levers and angles. Get those wrong, and you trade power for pain. The three measurements that decide everything are standover height, saddle height, and reach. Each has a hard floor from the manufacturer’s manual, not from a salesperson’s guess.
Common mistake: Prioritizing saddle height over standover clearance. A perfect saddle position is useless if you can’t touch the ground safely at a stoplight. The top tube is the first thing you contact in a tip-over, and that contact should be air, not bone.
Standover height is the clearance between your body and the bike’s top tube when you straddle it flat-footed. This is a safety measurement, pure and simple. For a bike ridden only on paved surfaces, the Giant manual specifies a minimum of two inches (5 cm). Take that bike onto unpaved trails, and the requirement jumps to three inches (7.5 cm). For serious off-road use, you want four inches (10 cm) or more. Mountain bikes with full suspension get a slight pass, you can start with 1-2 inches because the suspension compresses when you sit.
Saddle height sets your knee and hip angles for the entire ride. The mechanic’s rule is to set the saddle so your leg is almost straight at the bottom of the pedal stroke with your heel on the pedal. When you switch to the ball of your foot, you’ll have the proper slight bend. More than a 30-degree bend at the bottom of the stroke, and you’re wasting energy and straining the patellar tendon. Less than a 5-degree bend, and you’re rocking your hips, which leads to lower back pain inside an hour.
Reach is the horizontal distance from your saddle to your handlebars. It’s governed by the Effective Top Tube (ETT) length, a horizontal line from the head tube to the seat tube. If you have to lock your elbows straight to reach the hoods, the bike is too long. You want a slight bend in your elbows to absorb road vibrations. Numb hands and shoulder tension are the direct, immediate results of a reach that’s too long. A too-short reach crowds your chest and makes the bike feel twitchy.
| Measurement | Target (Road Bike) | Target (Mountain Bike) | Consequence If Wrong |
|---|---|---|---|
| Standover Clearance | 2+ inches (5+ cm) | 4+ inches (10+ cm) | Impact injury in a tip-over; unstable stops |
| Saddle Height (Knee Angle at Bottom) | 25-35 degree bend | 25-35 degree bend | Knee tendonitis or hip pain within 100 miles |
| Reach (Elbow Bend) | Slight bend, not locked | Slight bend, not locked | Numb hands, shoulder pain, less steering control |
Decoding Frame Size: It’s Not Just the Seat Tube
Bike manufacturers list a frame size, usually in centimeters or inches, that corresponds roughly to the seat tube length. That number is almost useless by itself. Two bikes with identical 54cm seat tubes can have wildly different top tube lengths and head tube angles. You need to look at the geometry chart, specifically the Effective Top Tube (ETT) and the Stack (vertical height of the head tube).
A road bike with a traditional straight top tube needs about 1″ of standover clearance. A road bike with a sloping top tube, a semi-compact or compact design, needs 2″ or more. This is because the sloping tube’s highest point is forward, and you measure clearance at the crotch point, which is lower. This is why you can often ride a larger sloping-frame bike comfortably.
Mountain bike geometry is a different language. The seat tube angle is steeper, pushing you forward over the bottom bracket for better climbing. The top tube is longer and slung lower for that critical standover clearance. When you look at a sizing a motorcycle, you consider wheelbase and seat height in tandem, mountain bike sizing uses the same two-variable logic. The seat tube number is just an entry point.
Where this goes sideways: Buying a bike based on your height alone. Height gets you in the ballpark, but your inseam and torso length are the real players. A 6’2″ person with a 34″ inseam needs a different frame than a 6’2″ person with a 32″ inseam. The first needs a bike with a longer seat tube and a shorter top tube; the second needs the opposite.
This is where non-standard bodies need to pay attention. Riders with longer torsos relative to their legs will feel cramped on a bike sized purely by standover height. They need a model with a longer ETT, sometimes from a brand known for “long and low” geometry. Our guide on frames for plus-size women dives into this exact challenge, finding a frame that supports proper reach when standover clearance forces a smaller seat tube.
Tools and Process for a DIY Bike Fit
You don’t need a pro fitter for a basic, safe setup. You need a tape measure, a level, a plumb bob (a string with a weight), and a friend for about twenty minutes. The goal is to translate the body measurements you just learned into adjustments on the bike itself.
Start with the bike in a trainer or against a wall so it’s upright and level. Have your friend hold it steady. 1. Set Saddle Height. Sit on the bike in your riding shoes. Place your heels on the pedals and rotate the cranks to the 6 o’clock position. Your leg should be completely straight. Now, put the balls of your feet on the pedals. You should have a slight bend in your knee (25-35 degrees). If your hips rock to reach the pedal, the saddle is too high. This step is non-negotiable. Skip it, and you’re asking for IT band syndrome. 2. Set Saddle Fore/Aft. With the pedals at 3 and 9 o’clock, drop a plumb line from the front of your forward knee. The line should fall through the ball of your foot on the forward pedal. This centers your weight over the pedal axle for optimal power transfer. Too far forward, and you overload your hands and triceps. Too far back, and you can’t climb effectively. 3. Check Reach. Get into your riding position on the hoods. Look down at your front hub. It should be hidden behind the handlebar. If you can see the hub in front of the bar, your reach is likely too long. Your elbows should have a visible, relaxed bend. If they’re locked, you need a shorter stem. Stem swaps are the standard tool for tuning your brakes and your cockpit, they’re a $30 part that changes everything.
The part nobody mentions: Your fit changes after the first few weeks. Cables stretch, suspension settles, and spokes seat. That’s why manuals like the one from Salsa Cycles recommend a 30-day checkup or a check after three to five hours of hard off-road use. The saddle might sink a few millimeters, and the handlebars might rotate slightly. That post-break-in tweak is what separates a good fit from a perfect one.
Sizing Different Bike Types: Road vs. Mountain vs. Hybrid
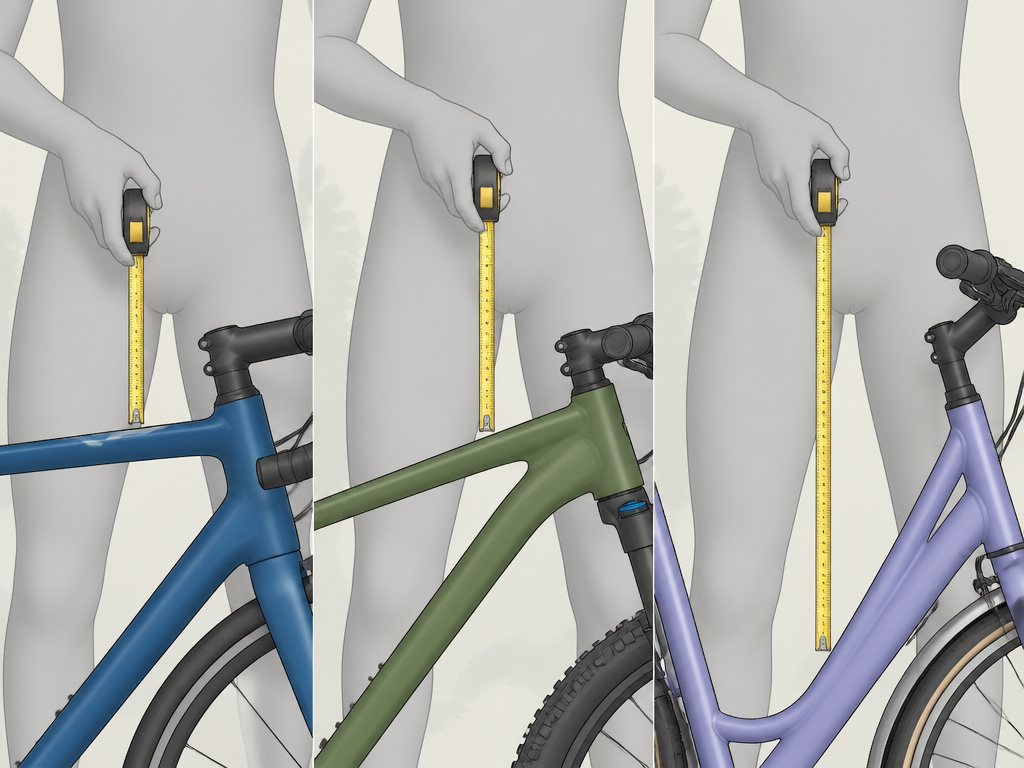 The core principles of standover, saddle, and reach apply to every bike. But the application changes with the bike’s job. A race bike and a cruiser share the same biomechanics, but they express them through wildly different geometry.
Road Bikes prioritize aerodynamics and power transfer. You’ll have a lower front end (lower stack) and a longer reach relative to the seat tube. This puts more weight on your hands and core. The standover clearance is tighter, often just meeting the minimum 2-inch guideline. The handlebars are narrow and dropped.
Mountain Bikes prioritize stability and maneuverability. The front end is higher (taller stack), and the reach is shorter to keep you centered between the wheels for technical terrain. Standover clearance is generous, often exceeding 4 inches. The handlebars are wide and flat or riser-style. The wrong size here doesn’t just hurt, it makes technical trails unrideable. It’s as critical as picking the right ATV tire size for traction and clearance.
Hybrid/City Bikes aim for comfort and upright visibility. They have the tallest stacks and shortest reaches. Standover is very generous, often with a step-through frame option. The sizing here is more forgiving, but the reach rule still applies: you shouldn’t feel like you’re reaching for the bars.
| Bike Type | Standover Priority | Reach Character | Primary Fit Risk |
|---|---|---|---|
| Road/Racing | Minimum clearance (2″) | Longer, stretched | Lower back/hand numbness |
| Mountain/Trail | Maximum clearance (4″+) | Shorter, centered | Poor control on descents |
| Hybrid/City | Very generous | Short, upright | Cramped, inefficient pedaling |
When Professional Help Is Non-Negotiable
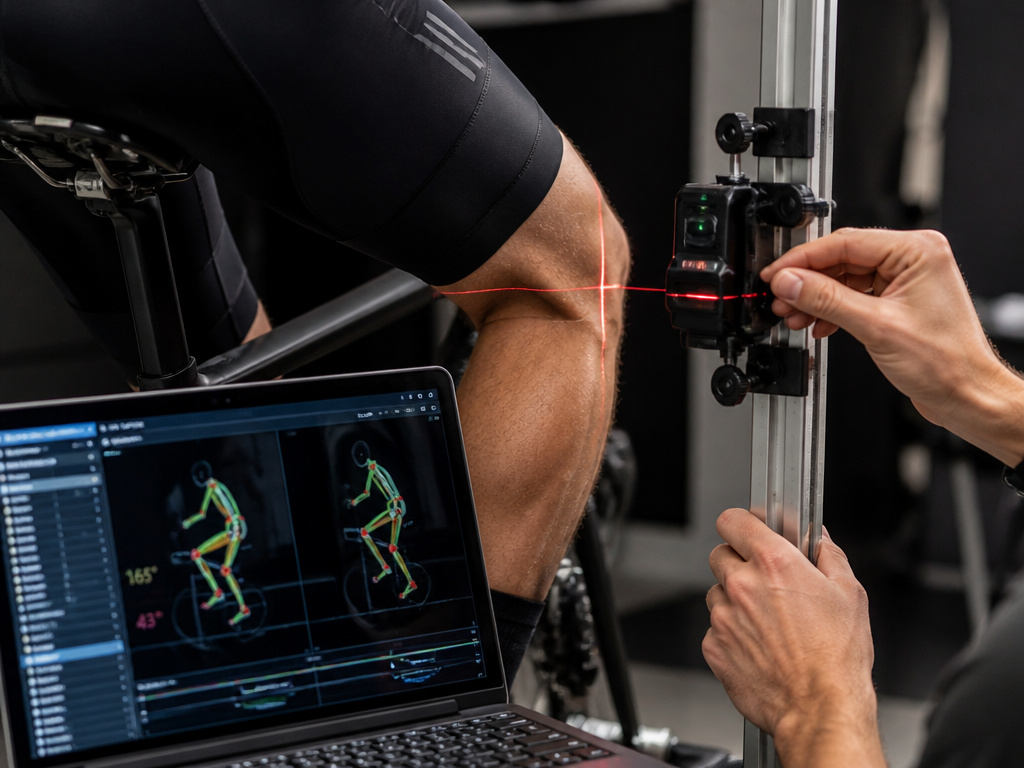 A tape-measure fit gets you 85% of the way. The last 15% requires tools, expertise, and sometimes a second pair of experienced eyes. You need a pro fit if you have chronic pain, asymmetries, or goals beyond basic recreation.
Signs you need a bike fitter: * Knee, foot, or hand numbness/pain that persists after adjusting saddle height and reach. * One side of your body feels more fatigued or sore than the other. * You’re preparing for a multi-day tour or racing event. * You’ve had a previous injury (knee surgery, back issues) that affects your range of motion.
A professional fit uses motion capture cameras, laser levels, and adjustable jigs to measure your pelvic rotation, knee tracking, and foot stance. They might recommend custom insoles, different men’s saddles, or a stem with a unique angle. This level of detail is supported by research like the NIH bicycle set-up study, which established consensus measurement methods for exactly this scenario. It’s an investment, but it’s cheaper than physical therapy.
The Safety Standard You’ve Never Heard Of: ISO 4210-2
Bike sizing isn’t just about comfort. It’s a regulated safety issue. The international standard ISO 4210-2:2023 specifies safety requirements for bicycles, including dimensions that directly limit what size bike a person can safely operate.
The standard notes that for bicycles with a maximum saddle height of 435 mm or less, national regulations for ride-on toys apply. For bikes with a maximum saddle height between 435 mm and 635 mm, ISO 8098 is relevant. This is the standard covering “Cycles. Safety requirements for bicycles for young children.” What this means is that the very definition of an adult bicycle starts at a saddle height that a small adult or a tall child might not safely straddle. The standard also dictates brake-lever reach distances to ensure smaller hands can safely operate the brakes, a direct fit-and-safety link.
ISO 4210-2 isn’t just a manufacturing guide. It’s the baseline for legal liability and product safety. A bike that doesn’t meet it shouldn’t be on the market, and a rider who doesn’t fit a bike that meets it shouldn’t be on that bike.
When you see a manual like the Salsa Cycles Bicycle Owner’s Manual stating it meets ISO-4210, 16 CFR 1512, EN 14764, EN 14766 and EN 14781 Standards, that’s your guarantee that the size chart in the back was created against a recognized safety benchmark. It’s not marketing.
Before You Go
Sizing a bike is a blend of simple measurement and subtle physiology. The tape measure gives you the hard boundaries: two inches of standover, a straight-leg heel height, a bent-elbow reach. Your body’s feedback on the first few rides fine-tunes the rest.
Remember the break-in period. Schedule that 30-day tune-up. Listen for numbness or pinpoint pain, they’re error messages, not endurance tests. And when in doubt, use the standards. ISO 4210-2 and the OEM manuals are the ultimate authority, not a forum thread or a well-meaning friend.
Your bike should feel like an extension of your body, not a machine you’re fighting. Get these three numbers right, and that’s exactly what it becomes.
Frequently Asked Questions
What happens if my bike is slightly too big?
You’ll compensate by lowering the seatpost and using a shorter stem, but you can’t fix excessive standover height. A too-long reach forces locked arms, leading to numb hands, shoulder pain, and less control on descents. You’ll also be more likely to strike the top tube in a dismount, which is a direct impact risk.
Can I size a bike online accurately?
You can get close if you have your exact inseam, torso, and arm measurements, and the brand publishes a detailed geometry chart with stack and reach figures. Online calculators use height and inseam, which misses torso length, the key variable for reach. Always verify with a real-world test if possible.
How much clearance do I need for a mountain bike?
For serious off-road use, the Giant manual recommends four inches (10 cm) or more of standover clearance. This gives you room to maneuver and bail safely on uneven terrain. For a full-suspension bike, you can start with 1-2 inches of clearance since the suspension will compress under your weight.
Is saddle height or standover height more important?
Standover height is a safety imperative, it prevents injury in a tip-over. Saddle height is a performance and comfort imperative, it protects your knees and hips. You cannot prioritize one over the other; both must be correct. If a bike doesn’t offer safe standover clearance for your inseam, it is the wrong bike, regardless of saddle adjustment range.
What is the “effective top tube” and why does it matter?
The Effective Top Tube (ETT) is the horizontal distance between the head tube and the seat tube. It’s a much better indicator of how stretched out you’ll be on the bike than the seat tube length alone. Two bikes with the same seat tube length can have different ETTs, making one feel cramped and the other too long.
Do I need a professional bike fit?
If you ride less than 50 miles a week without pain, a careful DIY fit is sufficient. If you experience persistent pain, numbness, or plan to ride competitively or for long distances, a professional fit is a wise investment. They can identify subtle asymmetries and make component recommendations, like specific comfortable saddles or handlebar widths, that a home fit can’t address.
