
How to Choose the Right ATV Tire Size: A Complete Guide
This post contains affiliate links. As an Amazon Associate, we earn from qualifying purchases.
To choose the right ATV tire size, match the three numbers on your sidewall. Height x Width – Rim Diameter, to your owner’s manual. Never increase diameter more than 2 inches over stock without clutch work. Since July 2022, all legal ATV/UTV tires are marked “NHS” (Non-Highway Service). Mismatching sizes or types wears out ball joints and wheel bearings within a season.
That diameter limit is a mechanical boundary. A taller tire acts like a longer lever on every suspension and drivetrain component.The force multiplies.
What follows is a breakdown of the three numbers, the hidden specs that matter more, and the OEM data most guides skip. You’ll know how to read a sidewall, why a Maxxis MU25 is Honda’s pick for the TRX500 front, and when to walk away from a tire that doesn’t have “NHS” molded into the rubber.
Key Takeaways
- The sidewall code “25×10-12” means a 25-inch tall, 10-inch wide tire for a 12-inch rim. Match this to your manual.
- Increasing tire diameter more than 2 inches over stock requires clutch tuning and accelerates wear on wheel bearings and ball joints.
- Since July 2022, legitimate ATV tires must carry the “NHS” (Non-Highway Service) marking per the Tire & Rim Association.
- Replace tires in axle pairs (front or rear) with identical size and type. Mixing radial and bias-ply tires destabilizes handling.
- Tire pressure is terrain-dependent: 10-15 PSI for trail comfort, 15-18 PSI for high-speed desert runs to prevent sidewall fold.
Decoding the Sidewall: Height, Width, and Rim
Look at the largest molded numbers. A code like 25×10-12 is your blueprint.
The first number is the overall tire height in inches. This is the loaded diameter, how tall the tire stands when mounted, inflated, and under the ATV’s weight. The second number is the section width. The last number is the rim diameter, the only measurement that cannot be smaller than stock. Your brake caliper won’t allow it.
Tire Size Format: Height (in.) x Width (in.) – Rim Diameter (in.). Example: 30×10-14 denotes a 30-inch tall, 10-inch wide tire for a 14-inch wheel. Always verify this against the vehicle’s owner’s manual for OEM-approved fitment.
Those numbers are based on a specific wheel width and pressure. A tire labeled 25×10-12 might measure 24.5 inches tall on a narrow rim or at low psi. This variability is why you measure clearance with the actual wheel you’ll use.
The rim diameter is your starting filter. Retailers like BB Wheels organize their entire ATV tire catalog by this number because it’s the non-negotiable fit. Choose your rim size first, then sort by height and width.
The Specs Behind the Numbers: Ply, NHS, and Construction
The size gets the tire on the rim. Three other specs determine if it survives your ride.
Ply Rating (PR): This isn’t literal ply count anymore; it’s a strength index. Most UTVs ship with 6-ply, but 8-ply is common for heavier rigs. A 10-ply rating offers maximum puncture resistance at the cost of a stiffer, less forgiving ride. The extra weight also strains drivetrain components.
NHS Marking: As of July 2022, this is mandatory. “NHS” stands for Non-Highway Service, a Tire & Rim Association designation for tires designed primarily for off-road use. If a tire lacks this marking, it’s not legally intended for ATV/UTV use and may have unsuitable bead bundles or sidewall reinforcement.
Radial vs. Bias-Ply Construction: The letter “R” on the sidewall denotes a radial. | Construction | Cord Layout | Best For | Drawback | |——————|—————–|————–|————–| | Radial (R) | Ply cords run bead-to-bead at 90°, with a stabilizing belt under the tread. | Longer tread life, smoother ride on hardpack, better steering precision. | Generally more expensive. | | Bias-Ply (No letter) | Multiple ply layers criss-cross at 30-60° angles. | More sidewall flex for crawling over rocks and roots. | Can feel “squirmy” at high speed, generates more heat. |
Mixing these types on the same vehicle is a documented hazard. The ATV & UTV Tire Safety info sheet warns that mixing radials with bias or belted-bias tires may adversely affect handling and stability. The different flex characteristics can make the ATV unpredictable in corners.
How to Find Your OEM Size and Recommended Replacements
Your owner’s manual is the final authority. It lists the exact size and often a specific tire model.
The Honda TRX500 manual, for example, doesn’t just say “25×8-12.” It specifies: front AT25 × 8-12 MAXXIS MU25, rear AT25 × 10-12 MAXXIS MU26. Yamaha is equally precise for the Kodiak 700: front MAXXIS MU19 (AT25 x 8-12), rear MAXXIS MU20 (AT25 x 10-12).
Common mistake: Replacing just one tire on an axle. The Honda manual is explicit: “It is best to replace all four tires, however if that is not possible, you must replace the tires in pairs (front or rear) with tires of the same size and type as the originals. Never replace just one tire.”
This concerns maintaining identical rolling circumference for the differential and transmission. A mismatch on a driven axle causes binding and accelerated wear.
If your manual is lost, the current tire’s sidewall is your backup. Use that code. For a deeper dive on how dimensional changes affect your machine, our article on the tire size impact breaks down the engineering trade-offs.
The Real Cost of Bigger Tires
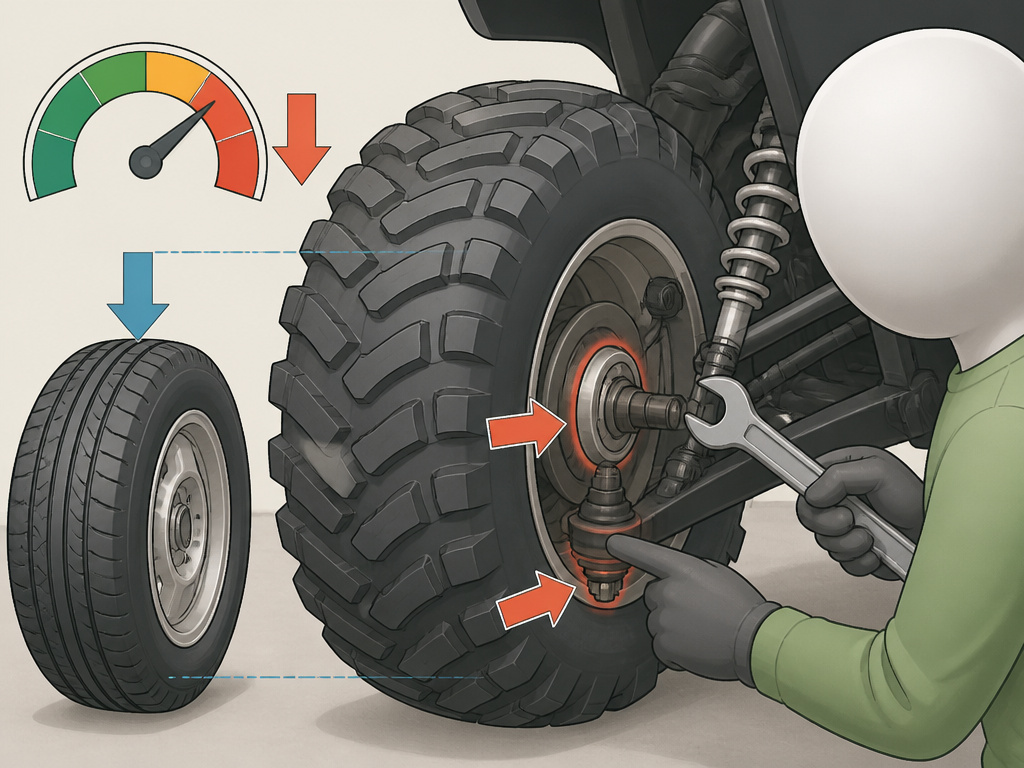 The urge to go taller is strong. Ground clearance improves. The ATV looks more aggressive. The cost is hidden in the drivetrain.
Dirt Wheels Magazine states the universal limit: “Typically, without major modifications, you don’t want to increase the tire diameter by more than 2 inches over stock.” Exceed this, and three things happen.
First, you lose horsepower. The engine must work harder to turn the heavier, larger-diameter tire. This usually demands clutch work to restore performance. Second, leverage increases. The taller tire acts as a longer lever on the wheel bearing and ball joint. These components are sized for the stock lever arm; the extra force wears them out in months, not years.
Finally, your speedometer and odometer become inaccurate. More importantly, a significant tire size change can affect gear ratios enough to cause overheating in hard use.
| Increase Over Stock | Likely Modifications Needed | Expected Impact on Wear |
|---|---|---|
| Up to 1 inch | None. | Minimal. Slight bearing load increase. |
| 1 to 2 inches | Clutch re-springing/weighting. | Noticeably faster wear on wheel bearings and ball joints. |
| Over 2 inches | Clutch work, potential gear reduction, lift kit for clearance. | Rapid failure of stock drivetrain and suspension components. |
The width has consequences, too. A wider tire can rub on the inner fender or suspension at full lock. It also changes the steering effort and can make the ATV feel less nimble on tight trails.
Matching the Tire to Your Terrain (and Pressure)
 Size and construction are about fit. Tread pattern is about function. Pressure bridges the two.
A mud tire like the Moose Aggro has wide, spaced lugs that shed sticky clay. An all-terrain ATV tire has tighter lugs for a smoother ride on hardpack. A specialized ATV mud tire sacrifices pavement manners for deep-rut traction.
Your terrain dictates your pressure. It’s not a single setting. – Rock Crawling (Under 10 PSI): Maximizes contact patch and conforms to obstacles. Requires beadlock wheels to prevent the tire from slipping on the rim. – Trail Riding (10-15 PSI): Balances comfort, traction, and pinch-flat protection. Ideal for mixed-speed sightseeing. – High-Speed/Desert (15-18 PSI): Prevents the tire from folding over in hard corners, protecting the sidewall from sharp rocks. – Maximum Flat Protection (18-25 PSI): Used by desert racers who prioritize keeping a tire alive over ride quality.
Always check pressure cold with a reliable gauge. The Yamaha Kodiak manual lists a maximum tire seating pressure of 36 PSI for mounting, never exceed the sidewall’s max inflation pressure to seat a bead.
Installation, Storage, and Critical Checks
Mounting an ATV tire is not a casual garage job. The safety PDF is clear: “Only specially trained persons should mount tires.” The high pressure needed to seat the bead can cause an explosion if done incorrectly.
Before you start: Use a new valve stem for tubeless tires every time. Inspect the wheel for cracks or damage. Never exceed the tire’s maximum seating pressure (often marked on the sidewall) to pop the bead onto the rim.
Once mounted, storage matters. Tires age faster in specific conditions: – Sunlight: UV radiation hardens and cracks rubber. – Ozone: Keep tires away from electric motors (e.g., in a workshop) which generate ozone. – Oil/Gasoline: Wipe off any contamination immediately. Prolonged contact ruins the rubber compound. – Temperature Swings: A cool, stable environment is best.
Before any ride, grasp each tire at the front and rear and rock it. There should be no play. Any looseness indicates a worn wheel bearing or loose axle nut, a failure point that leads to a lost wheel.
Frequently Asked Questions
What does the “NHS” on my ATV tire mean?
NHS stands for “Non-Highway Service.” It’s a designation from the Tire & Rim Association that became mandatory for all ATV/UTV tires in July 2022. It certifies the tire is designed for primary off-road use. If your tire doesn’t have it, it may not be suitable for your machine.
Can I put a 26-inch tire on my ATV that came with 24-inch tires?
Maybe, but measure first. A 26-inch labeled tire might only be 25.5 inches tall on your rim. If the true measured increase is 2 inches or less over stock, you’re likely okay but should expect more drivetrain wear. If it’s more, you’ll need clutch work and accept accelerated component failure. Always check clearance at full suspension compression and steering lock.
Are radial tires better than bias-ply for ATVs?
It depends on your riding. Radial tires (marked with an “R”) generally offer a smoother ride, better high-speed stability, and longer tread life on hard surfaces. Bias-ply tires flex more, which can provide better traction in rocky, low-speed crawling situations. Do not mix them on the same vehicle.
How often should I check my ATV tire pressure?
Check it cold before every ride. A drop of 2 PSI significantly changes handling and increases the risk of a pinch flat or sidewall damage. For the right tires for trail riding, consistent pressure is the key to predictable handling.
My owner’s manual lists a specific tire model. Do I have to buy that exact one?
It is the safest recommendation. You must match the exact size (e.g., 25×8-12), construction type (radial or bias), and load rating.The recommended model, like the Maxxis MU25, is what the engineers validated for that machine’s handling, braking, and gearing. Deviating changes those parameters.
The Bottom Line
Choosing the right ATV tire size is a process of elimination. Start with the rim diameter. Match the height and width to your manual’s OEM spec or stay within a 2-inch total diameter increase. Verify the NHS marking and a ply rating that matches your weight and terrain.
Then, pick the tread for your dirt. For a balanced choice, start with a set of versatile ATV tires that won’t let you down. Mount them with new valve stems, set the pressure for your trail, and check for wheel play before you twist the throttle.
The right tire doesn’t just fit. It disappears, letting you focus on the ride instead of the machine.
