
Learn How to Maintain an RV Roof to Prevent Damage
This post contains affiliate links. As an Amazon Associate, we earn from qualifying purchases.
To maintain an RV roof, you need a schedule: clean a fiberglass roof every three months, inspect all seals semi-annually, and get a professional dealer inspection annually. Control interior humidity to 60% or less, 35% in cold climates, to prevent condensation damage. The wrong cleaner or incompatible sealant can cause permanent damage, especially on roofs built after 2011.
That cleaning and inspection cadence is printed as a requirement in the routine maintenance section of Tiffin Motorhomes owner manuals. Missing those deadlines is how you find soft spots in the roof decking by year three.
What follows is the breakdown of those OEM schedules, the specific products that won’t void warranties, and the one chemical compatibility warning that reshaped the entire industry after 2011. By the end, you’ll know the difference between a simple scrub and a repair that needs a parts list straight from an NHTSA bulletin.
Key Takeaways
- Inspect all roof and body seals every six months; reseal any cracks or peeling immediately with a compatible product.
- Clean a fiberglass roof quarterly; clean an EPDM or TPO rubber roof at least four times a year with a dedicated rubber roof cleaner like Dicor RP-RC160C.
- Maintain interior relative humidity at or below 60% (35% in cold climates) using exhaust fans, AC, or a dehumidifier to prevent hidden condensation damage.
- Identify your roof material (EPDM, TPO, or fiberglass) before any major repair; sealants incompatible with post-2011 TPO formulations cause bloating and permanent membrane damage.
- For major leaks, reference the specific parts list in the NHTSA bulletin for 2022-2024 Entegra Coach models; a proper fix requires exact materials.
The Semi-Annual and Annual Inspection Schedule
Forget checking your roof “once in a while.” Manufacturer manuals assign hard deadlines. The 2027 Tiffin Byway and 2025 Phaeton manuals state that seals around doors, windows, vents, and slide-out trim must be checked at least semi-annually. The roof seams themselves need the same six-month look for cracking or peeling.
Common mistake: Putting off a spring inspection until fall. A hairline crack in July becomes a channel for gallons of water by September’s first heavy rain. The repair cost multiplies with every storm.
This isn’t about a quick glance. Get on the roof, safely, with a ladder rated for your weight. Run a gloved hand along every seam of lap sealant. You’re feeling for brittleness, gaps, or a texture that’s more putty than rubber. Push on the roof surface near vents and air conditioners. A soft, spongy feel means water has already saturated the underlying wood. That’s a critical find.
| Inspection Point | What to Look For | Consequence If Missed |
|---|---|---|
| Lap Sealant (all seams) | Cracking, peeling, shrinkage away from edges | Direct water intrusion into roof deck; repair evolves from resealing to deck replacement. |
| Roof Vent & AC Seals | Gaps, brittleness, visible daylight around base | Water runs along mounting bolts into ceiling insulation, causing hidden mold. |
| Roof Surface (for soft spots) | Spongy give when pressed, visual sagging | Indicates rotten decking; requires full tear-off to repair structural integrity. |
| Slide-Out Seals & Gaskets | Tears, deformation, lack of spring-back | Compromises interior seal, allowing drafts, water, and pests into the living area. |
The annual professional inspection is the other non-negotiable line item. A dealer technician has the training to spot early-stage failures you might miss, like incipient cracking in a specific brand of sealant or subtle deck deflection. This is especially crucial after the vehicle’s third year, when factory-applied sealants begin their natural aging cycle.
The Right Cleaners and Protectants
A clean roof is a durable roof. Grime traps moisture and accelerates UV degradation. But the wrong chemical is worse than dirt.
For EPDM or TPO rubber roofs, the Lance Camper manual is explicit: use Dicor Rubber Roof Cleaner. The concentrate (RP-RC160C) is for a full wash; the ready-to-use spray (RP-RC320S) handles spot cleaning. The warning is absolute: do not use cleaners containing petroleum solvents, harsh abrasives, or citric-based cleaners. These can irreparably damage the membrane and void your warranty.
The chemical formulation of modern roof protectants makes it harder for dirt to stick. Applying a product like Dicor’s RP-RG320S Rubber Roof Guard after cleaning adds a sacrificial UV barrier. It’s the equivalent of waxing your car’s paint.
Fiberglass roofs, like those on many Tiffin models, need cleaning at least every three months. The process is less sensitive but still specific. Use a mild, non-abrasive automotive soap. A medium-bristle brush works for scrubbing, but never a pressure washer. The high-pressure jet can force water past seemingly intact sealants and into screw holes.
Here is the basic cleaning workflow for any roof type: 1. Rinse first. Use a garden hose to remove loose debris. This prevents scratching the surface during scrubbing. 2. Mix cleaner as directed. For Dicor concentrate, this usually means a few ounces per gallon of water. Applying it full-strength is for stubborn stains only. 3. Scrub in sections. Work on a 3-foot by 3-foot area, agitating the cleaner with your brush. This method prevents the cleaner from drying on the surface, which can leave a residue. 4. Rinse thoroughly. Any cleaner left behind can become a sticky attractant for more dirt and promote mildew growth. 5. Apply protectant (optional). For rubber roofs, a protectant spray can extend the time between cleanings and fight UV oxidation.
Humidity Control: The Invisible Enemy
Water damage doesn’t only come from the outside. The Tiffin manuals pinpoint a critical indoor metric: relative humidity should be maintained at 60% or less. In cold climates, that target drops to 35% or less to avoid window condensation.
This is a moisture-management directive. Humidity levels above these thresholds let water vapor condense on cold interior surfaces, inside walls, under cabinets, within ceiling cavities.That hidden moisture is the primary fuel for mold and rot you never see until a wall softens.
Where this goes sideways: Relying solely on an air conditioner in a hot, humid climate. The AC removes heat and some moisture, but it may not keep up. The manual notes a portable dehumidifier is often necessary, and its collection bucket must be checked or drained regularly.
Your tools are the roof air conditioner, exhaust fans (especially in the bathroom and kitchen), and a standalone dehumidifier. Run the exhaust fan for at least 20 minutes after showering. In storage, if the RV isn’t climate-controlled, a small desiccant dehumidifier running on a low wattage can protect your investment for months.
Sealant Types, Curing, and the 2011 Compatibility Warning
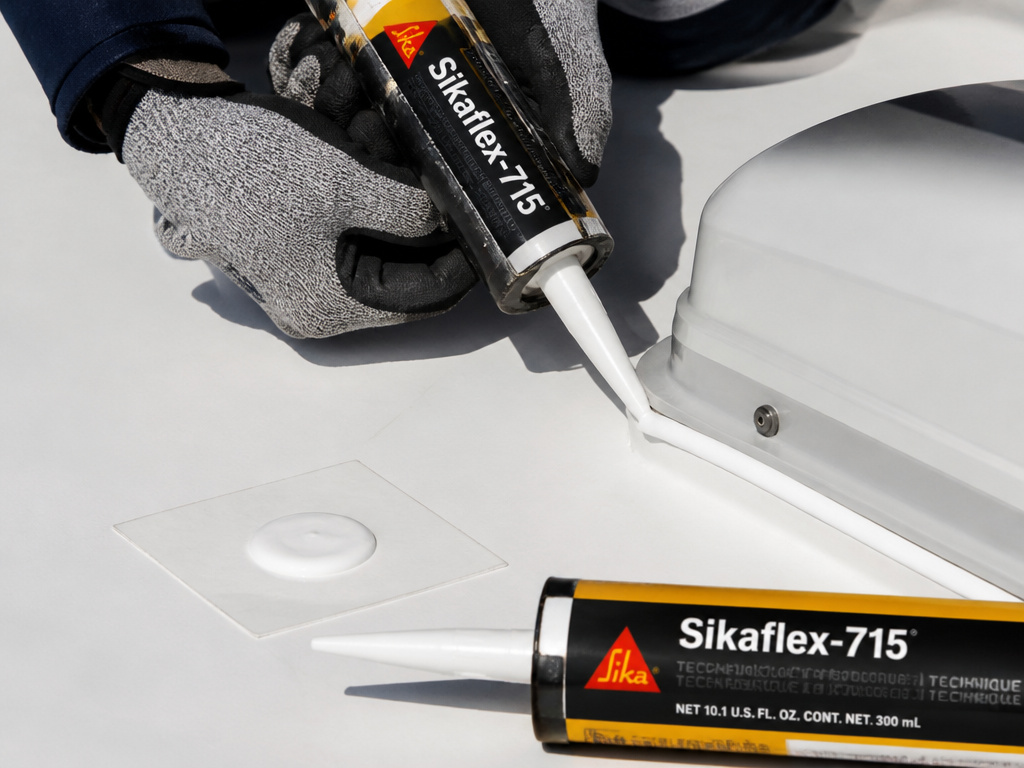
Not all sealants are equal. Using the wrong one doesn’t just fail, it can actively destroy your roof.
The industry has shifted from traditional non-curing sealants to chemical-curing products like Sikaflex-715. A 2024 NHTSA dealer service bulletin explains the difference. Traditional sealants dry and shrink, leading to the all-too-common cracks. Sikaflex-715 cures through a chemical reaction, forming a flexible, elastic bond with minimal shrinkage. It skins over in about 30 minutes and achieves full cure in 3 to 7 days.
“Sikaflex-715 is UV stable and stands up to the harshest environmental conditions. From extreme cold, to hot and humid, the product remains stable, and the RV roof is sealed.”. NHTSA Dealer Service Bulletin NO.: 7SB002-24-01A
But the critical warning comes from Dicor. For RVs built in 2011 or later, you must identify if your roof is TPO (Thermoplastic Polyolefin) or EPDM (Ethylene Propylene Diene Monomer). Dicor testing found that some new TPO formulations are not chemically compatible with existing lap sealants. Using an incompatible sealant causes “bloating and disfiguration of the membranes.” The damage is permanent.
| Sealant Type | How It Works | Best For | Key Limitation |
|---|---|---|---|
| Traditional Lap Sealant | Dries/skins over; remains pliable like putty. | Quick, temporary patches; older EPDM roofs. | Shrinks and cracks over time; higher VOC content. |
| Chemical-Curing (Sikaflex-715) | Moisture-cured chemical reaction; forms elastic bond. | Permanent seams on EPDM roofs; high-movement areas. | 3-7 day full cure time; requires specific surface prep. |
| Self-Leveling Lap Sealant | Flows to smooth out; fills gaps. | Horizontal seams around roof fixtures. | Runs easily; not for vertical or angled surfaces. |
Before a major resealing job, test a small amount of your chosen sealant in an inconspicuous area. If the roof membrane wrinkles, bubbles, or changes texture within 24 hours, stop. You need a compatible RV roof sealant formulated for your specific material.
When a Leak Means a Full Repair
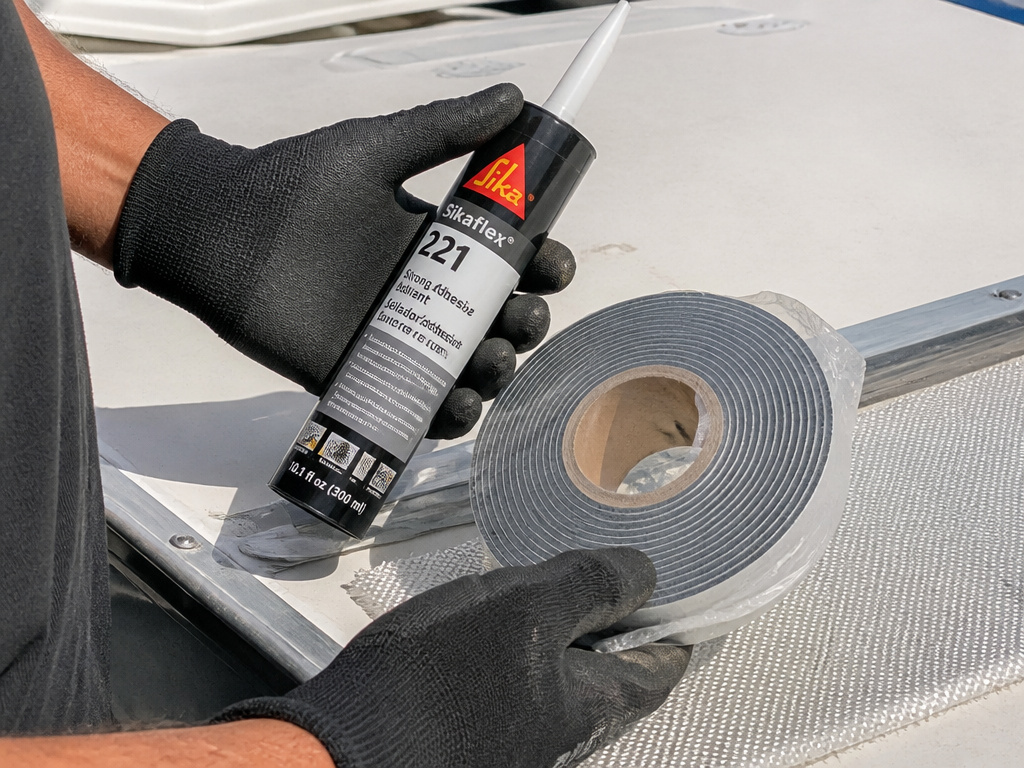
Sometimes maintenance fails, or a latent defect appears. The NHTSA published a bulletin in March 2024 for “Cracking in roof assembly causing leaks” on 2022-2024 Entegra Coach models. The bulletin isn’t just an advisory; it’s a parts list for a complete roof deck rebuild.
The listed materials include specific butyl tapes, Sikaflex sealant tubes, fiberglass sheets, and aluminum trim by part number. This underscores a vital principle: a proper, lasting repair requires a surgical rebuild with OEM-specified materials. If your leak investigation points to structural deck failure, this level of repair is what a professional will perform.
For the rest of us, the takeaway is scale. A dime-sized sealant gap is a DIY fix with a tube of self-leveling caulk. A wet ceiling panel pointing to a soft roof spot likely means a roof coating won’t save you. Knowing when to call a professional, one who understands these material specs, is the final, most important maintenance skill.
Frequently Asked Questions
How often should I really clean my RV roof?
Follow your OEM’s schedule. For fiberglass roofs (Tiffin), clean at least every three months. For rubber roofs (EPDM/TPO), the Lance Camper manual says at least four times a year. In heavy pollen or tree sap areas, double that frequency.
Can I just use dish soap and water to clean my roof?
On a fiberglass roof, a mild automotive soap is safer. On a rubber roof, never use dish soap. Its degreasing agents and additives can dry out and degrade EPDM or TPO. Always use a dedicated rubber roof cleaner like Dicor’s product to protect the warranty.
What is the best sealant for an RV roof?
For most applications on EPDM roofs, a chemical-curing sealant like Sikaflex-715 offers superior crack resistance. However, you must verify compatibility, especially on post-2011 TPO roofs. For a vetted list of options, see our guide on the best sealant for camper roofs.
How do I stop black streaks on my RV roof?
Black streaks are typically a combination of dirt, pollen, and algae running off with rainwater. Regular cleaning with the correct product is the best prevention. Some protective coatings include a stain inhibitor to make the roof more slippery, preventing debris from adhering in the first place.
Is an RV roof coating worth it?
Roof coating adds a sacrificial UV-protective layer and can refresh the appearance of a faded roof. It is most worthwhile as a preventative measure on a sound, clean roof to extend its life. It is not a fix for active leaks or deteriorated sealant.
How do I prepare my roof for winter storage?
As part of your RV winterization, give the roof a final thorough cleaning and inspection. Ensure all seals are intact to keep snowmelt out. Controlling interior moisture is critical, so consider using a desiccant dehumidifier inside the stored RV.
Before You Go
Maintaining an RV roof is a mix of calendar discipline and material knowledge. Set reminders for those six-month seal inspections and quarterly cleanings. Buy the right cleaner, a bottle of Dicor concentrate is cheap insurance.
Remember the two numbers: 60% indoor humidity, 35% in the cold. And before you squeeze a sealant tube onto a roof built after 2011, know your membrane type. That one bit of research prevents a blistering, thousand-dollar mistake.
When a leak does appear, diagnose its scale. A tube of camper roof caulk handles a seam. A spongy roof needs a pro. Your roof protects everything you own on the road. Keep it tight, clean, and dry.
