
How Hard Are Onewheel Boards to Ride? The Real Answer
This post contains affiliate links. As an Amazon Associate, we earn from qualifying purchases.
Learning to ride a Onewheel is not the hard part. The board’s self-balancing technology makes standing and rolling forward intuitive within an hour. The real difficulty, and the source of its documented danger, is learning to interpret and obey its physical limits before you hit them. That skill takes weeks, and ignoring it has led to a full government recall for crash hazard and reported deaths.
The recall notice cites a specific failure mode: the board can stop balancing the rider if its limits are exceeded. That limit is the edge of the motor’s torque and the battery’s discharge rate, not a software bug. Your job as a rider is to feel the board’s warnings, pushback, haptic buzz, and back off before the physics gives out.Most injuries happen when a rider, comfortable with the balance, mistakes that comfort for mastery and pushes through the safety cues.
What follows is a breakdown of the three-phase learning curve: initial balance, basic maneuvering, and advanced limit management. We’ll cover the non-negotiable safety updates, the gear that actually matters, and why comparing this to a skateboard or snowboard misses the point entirely.
Key Takeaways
- Balance is easy, limit management is not. The self-balancing system gets you rolling quickly, but learning to sense and respect motor/battery limits is a separate, critical skill that prevents crashes.
- “Pushback” is your only warning. When the board’s nose lifts, it means the motor has no reserve torque left. Leaning forward at this point guarantees a nose-dive crash.
- The CPSC recall is about ignored limits. The official regulator safety notice and subsequent recall stem from riders exceeding board capabilities, not a spontaneous mechanical fault.
- Mandatory firmware updates exist. All Onewheel models now have a “Haptic Buzz” alert system. If your board hasn’t been updated since late 2023, it’s missing a critical safety feature.
- Safety gear is non-negotiable. A certified helmet (ASTM F1492-08 or CPSC) is the bare minimum. Wrist guards are arguably more important for your first fifty miles.
How Does a Onewheel Actually Work?
A Onewheel is a single-wheeled, self-balancing electric vehicle. A 750W Hypercore hub motor (on Pint and Pint X models) sits inside the wheel itself.Solid-state MEMS sensors detect the board’s pitch angle over 500 times per second. When you lean forward, the motor spins the wheel to catch you, creating forward motion. Lean back, and it brakes.
The entire experience hinges on a simple physical trade-off. The motor has a finite amount of torque. That torque is split between keeping you upright and propelling you forward. At low speeds, most of it goes to stabilization, that’s why beginners feel so stable. As speed increases, more torque is diverted to fighting air resistance and maintaining velocity, leaving less in reserve for balance corrections.
The Onewheel Pint’s 750W Hypercore hub motor provides propulsion and self-balancing by constantly adjusting wheel speed based on sensor data. Its rated top speed of 16 mph (Pint) or 18 mph (Pint X) is not an arbitrary limit but the point where the motor can no longer allocate sufficient torque to keep the rider upright if a bump, gust, or lean demands a sudden correction.
This torque budget is the core of the difficulty. You can’t feel the budget directly. You only feel its consequence: pushback.
The Three-Phase Learning Curve: Balance, Control, and Limits
Phase 1: Finding Your Stance (First 1-2 Hours)
This is the easiest phase. Find a smooth, open parking lot. The app will have you calibrate the board on level ground. Mounting is the first hurdle: place your front foot flat across the front footpad, then step on with your back foot quickly. The board will wobble for a second, then lock in.
The self-balancing does the work. You’ll be riding in a straight line within ten minutes. Turning comes from shifting your weight heel-to-toe, like a snowboard. The instinct clicks faster than you expect. Most people leave this first session overconfident. That’s the danger.
Phase 2: Basic Maneuvering (First Week)
Now you learn to carve, stop confidently, and handle gentle slopes. You’ll switch from the beginner “Redwood” mode to something like “Pacific” or “Skyline” in the Digital Shaping 2.0 menu for more responsiveness. This phase builds muscle memory for weight distribution.
The critical habit to form here is scanning. You stop looking at your feet and start looking 20 feet ahead. You learn to read pavement texture and anticipate cracks. This is also when you should practice emergency stops by lifting your heel sharply. If your board has Simplestop enabled (Pint/Pint X), slowing down and leaning back will dismount you automatically.
Phase 3: Managing the Limits (Ongoing)
This is the hard part that never ends. You are now comfortable. You want more speed, steeper hills. This is where the board’s physics introduces itself.
Pushback is the primary warning. When the system nears its torque or battery limits, the nose of the board will physically lift, trying to slow you down. It feels like the board is pushing back against your shins. The official manual is unambiguous: “ALWAYS LEAN BACK TO SLOW DOWN WHEN PUSH BACK OCCURS. NEVER LEAN FORWARD INTO PUSH BACK.”
Ignoring pushback and leaning forward asks the motor for more than it has. The result is a sudden, violent nose-dive. The board stops balancing you because it literally cannot. You fall forward at full speed. This is the ejection hazard cited by regulators.
| Phase | Primary Skill | The Hidden Lesson | Common Mistake |
|---|---|---|---|
| Balance (Hours) | Mounting, standing, straight-line riding. | Trusting the self-balancing system. | Trying to steer with the torso instead of the hips. |
| Control (Week) | Carving, stopping, speed modulation. | Reading the terrain ahead of the wheel. | Over-leaning into turns and catching an edge. |
| Limits (Ongoing) | Interpreting pushback, managing battery, judging incline. | Understanding the motor’s finite torque budget. | Pushing through pushback to chase speed, causing a nose-dive. |
Why Pushback Is Not a Suggestion. It’s a Physics Report
Think of pushback as a dashboard warning light for torque. It activates in three key scenarios: 1. High Speed: Approaching the motor’s maximum RPM. 2. Low Battery: The battery can’t supply enough current for peak torque. 3. Over-Regeneration: Riding downhill on a full battery, which can overcharge cells.
The board is telling you the math no longer works. The reserve torque needed to keep you upright if you hit a bump or need to correct is gone.This is why the learning curve steepens here. You must develop a “pre-pushback” sense, knowing how your speed, battery level, and terrain slope eat into that torque reserve.
Where this goes sideways: Treating pushback like a challenge. A rider who feels the nose lift and thinks “I can push through it” is committing to a crash. The board will nose-dive within the next 1-3 seconds. The resulting fall often leads to upper-body fractures or head trauma.
This is also where model choice matters. A Onewheel Pint has a 16 mph top speed before pushback. A Onewheel GT pushes back closer to 20 mph. The GT has a more powerful motor, so its torque budget is larger, but the fundamental rule is identical: pushback means stop asking for more.
The Mandatory Safety Gear Nobody Skips
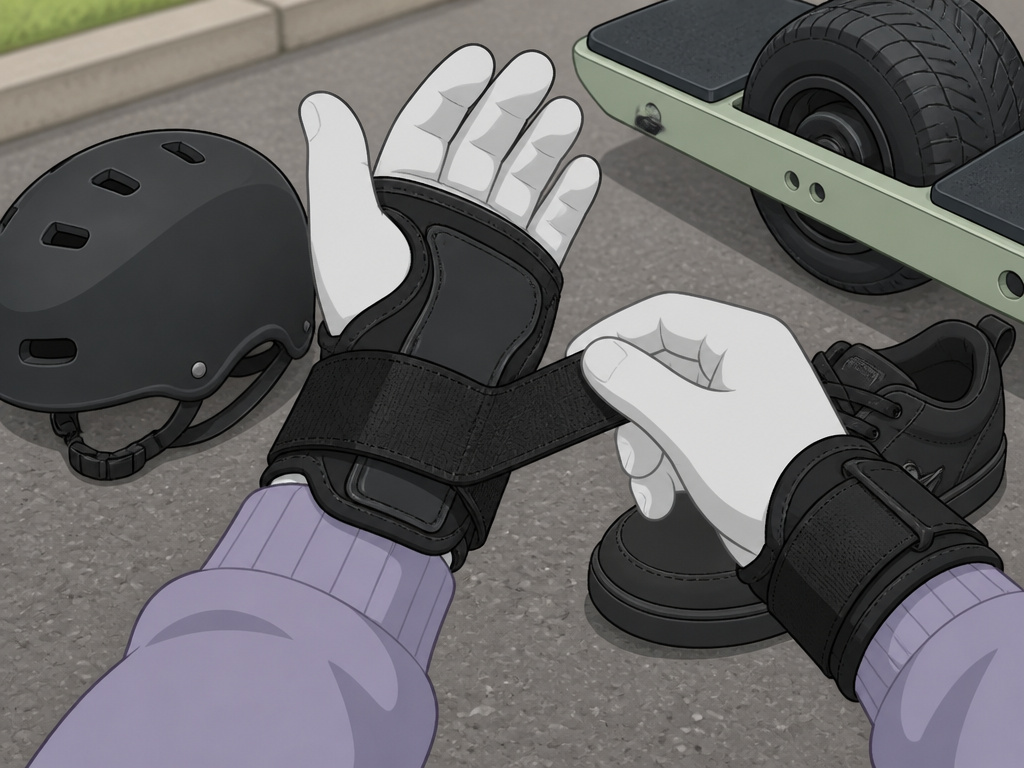
If you skip this section, don’t ride. The injury reports are too consistent.
- Helmet: Must be certified to ASTM F1492-08 or CPSC bicycle helmet standards. A skate-style helmet is fine. This is non-negotiable. Three of the four reported deaths involved riders without helmets.
- Wrist Guards: Your instinct in a forward fall is to put your hands out. Wrist guards prevent fractures and severe abrasions. Wear them every single time.
- Closed-Toe Shoes: Shoes that grip the grip tape and stay on. No sandals, no flip-flops. Ankle support is a bonus.
- Elbow & Knee Pads (Recommended): Especially for your first 100 miles. Asphalt is unforgiving.
This is about keeping your skin on your body and your bones intact. The gear is cheaper than the emergency room visit.
The CPSC Recall and Haptic Buzz: What You Must Do
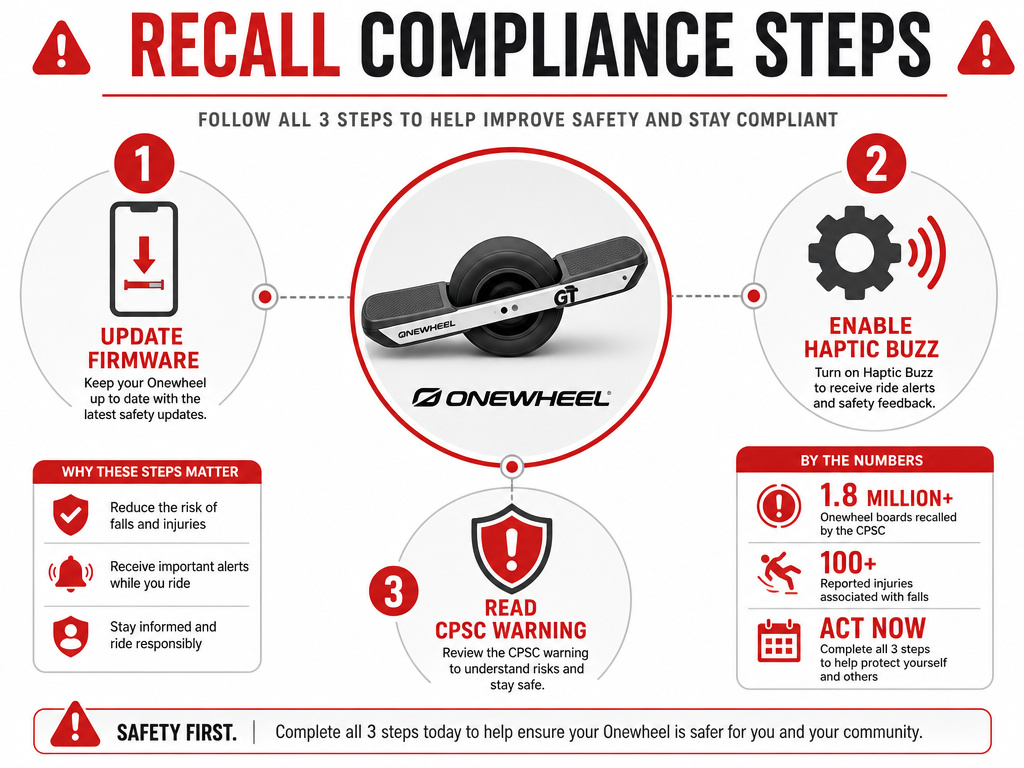
In September 2023, Future Motion recalled all Onewheel models after dozens of reports of incidents, including four deaths. The CPSC stated the boards “can stop balancing the rider if the boards’ limits are exceeded.”
This is the formal regulatory confirmation of the nose-dive hazard. The recall’s remedy was a firmware update that enables Haptic Buzz.
Haptic Buzz is a tactile and audible buzzing from the board that activates before pushback in some scenarios, and as a second warning if you ignore pushback. It’s an additional, unmistakeable alert that you are approaching the limit.
If you own a Onewheel:
- Update its firmware immediately via the official Onewheel app.
- Ensure Haptic Buzz is enabled in the app’s settings.
- Read the CPSC Onewheel safety warning to understand the documented risks.
This update doesn’t change the physics. It gives you one more chance to listen.
Onewheel vs. Other Rideables: A Reality Check
Is a Onewheel harder than a bike or scooter? Yes, fundamentally. A bicycle is statically stable at speed; it wants to stay upright. A Onewheel is dynamically stable only because a computer is making constant corrections. When that computer runs out of physical capability, the stability vanishes instantly.
It’s more akin to a snowboard in terms of control, but with a crucial difference: a snowboard doesn’t have a torque budget that can suddenly hit zero on a groomed run. This unique failure mode is why the learning curve has a hidden cliff. You can be a proficient carver and still get badly hurt by misjudging a hill or your battery level, just like misjudging your tire tread depth on a wet road can lead to a loss of control.
The maintenance burden is also higher. You must monitor battery health, tire pressure (PSI dramatically affects ride feel and range), and footpad sensor function. Neglect here increases risk, similar to how ignoring worn shocks can lead to unpredictable handling and uneven tire wear on a car.
Before You Go
So, are Onewheel boards hard to ride? The balance is easy. The lifelong discipline of riding within a machine’s hard, physical limits is difficult. It demands respect, continuous learning, and rigorous safety habits.
The board is a brilliant piece of engineering that delivers a unique feeling of flow. It is also a product with a documented history of serious injury when its warnings are ignored. Your first purchase shouldn’t be a Onewheel Pint X. It should be an ASTM-certified helmet and a set of wrist guards. Master the limits before you chase the thrill.
Frequently Asked Questions
How long does it take to learn to ride a Onewheel without falling?
Most people can ride straight and make basic turns without falling within their first 1-2 hours in a safe, open area. However, “learning to ride” in the full sense, including safely handling pushback, varied terrain, and emergency maneuvers, takes several weeks of regular practice. Falling is part of the process, which is why full safety gear is essential from day one.
Can you ride a Onewheel in the rain?
Future Motion’s official stance is that Onewheels are not waterproof, and water damage voids the warranty. While the boards have some resistance, riding in wet conditions significantly increases the risk of water ingress leading to motor or controller failure, and reduces tire traction. It’s not recommended, much like using all-terrain tires on a highway in a downpour increases stopping distances.
What is the most common injury for beginners?
Wrist fractures and abrasions are the most common. This is why wrist guards are arguably more important than knee pads for new riders. The second most common is shoulder injuries from high-side falls during carving. A certified helmet is your only defense against the most severe risk: traumatic brain injury.
Do you need to be fit to ride a Onewheel?
You need decent core strength and balance. The riding stance is athletic and engages your legs and core to control the board. It’s less about raw strength and more about endurance and stability. If you can stand on one leg for 30 seconds and do a bodyweight squat, you have the baseline fitness to start learning.
How does tire pressure affect the ride?
Tire pressure (PSI) is a critical tuning variable. Higher PSI (e.g., 20-24 PSI) makes the board feel more nimble and increases range, but gives a harsher ride. Lower PSI (e.g., 12-16 PSI) provides more cushion and grip for off-road trails, but reduces range and can make the board feel sluggish. It’s a personal preference that also interacts with rider weight, similar to how choosing tire sizes affects a vehicle’s handling and comfort.
