
Tips on Road Cycling for Beginners | The First 30-Day Plan
This post contains affiliate links. As an Amazon Associate, we earn from qualifying purchases.
Tips on road cycling for beginners start with matching three things: the right bike geometry for your body, the essential safety gear you won’t skip, and a skill-first riding plan that builds confidence mile by mile. An endurance-focused road bike, a MIPS-rated helmet, and a focus on braking and cornering technique will get you further than any carbon fiber upgrade in your first year.
Most guides list what to buy. They miss the order. You need the skills before you need the speed, and you need the fit before you need the fancy groupset. What follows is the sequence that works: five core skills, three gear non-negotiables, and the one traffic principle that cuts anxiety in half. By the last section you’ll have a 30-day blueprint that moves you from parking lot drills to confident main-road rides.
Key Takeaways
- Start with an endurance-geometry road bike; race geometry strains a beginner’s back and hands before fitness catches up.
- Tire pressure is not a guess. For a rider around 80kg, start at 100psi rear and 90psi front, then adjust based on the sidewall’s max.
- Practice clipping in and out on a soft surface first, but start rolling on asphalt, momentum prevents the dreaded tip-over.
- Cross-chaining (big chainring to big cog, or small to small) wears your drivetrain 40% faster and risks a thrown chain mid-pedal. Your first month focuses on repeating five core skills until shifting and braking become automatic.
Gear Up Right: The Shortlist That Actually Matters
You can ride in jeans and sneakers. You will hate it by mile five. The right gear solves problems you didn’t know you had: numb hands, a sore backside, and the panic of a loose water bottle. This process removes friction so you can focus on the road.
The bike comes first. For a beginner, endurance geometry is the only answer. These frames put you in a slightly more upright position, taking weight off your hands and opening your chest for better breathing. They’re more forgiving on rough pavement. A race geometry drops your torso low and stretches you out, great for aerodynamics, terrible for learning to handle the bike comfortably. Your local shop can point you to endurance models from brands like Trek (Domane), Specialized (Roubaix), or Cannondale (Synapse).
Where this goes sideways: Buying a bike based on frame material alone. Aluminum vs. Carbon matters less than the geometry and component spec. A well-fitted aluminum endurance bike beats a poorly sized carbon race bike every time for a new rider.
Helmet choice is non-negotiable. Look for a MIPS (Multi-directional Impact Protection System) label. This slip-plane layer inside the helmet reduces rotational forces on your brain during an angled impact, the kind most common in cycling falls. Brands like Giro, Bell, and Specialized integrate MIPS across their ranges. Try them on; the fit should be snug without pressure points.
Your contact points, feet, hands, and seat, deserve specific kit. Clipless pedals like the Shimano PD-R550 create a secure connection, letting you pull up on the pedals for a more efficient stroke. Pair them with stiff-soled cycling shoes. The Shimano RP1 is a common starting point. Don’t forget padded bib shorts. The pad (chamois) reduces saddle soreness, and the bib straps prevent the waistband from rolling down. The padding isn’t just foam; it’s moisture-wicking and antimicrobial.
| Gear Category | Beginner Priority | Risk If Skipped |
|---|---|---|
| Bike Geometry | Endurance frame | Wrist/back pain within 3 rides, handling feels twitchy |
| Helmet | MIPS-integrated | Higher risk of concussion from common oblique impacts |
| Footwear | Stiff-soled cycling shoes | Hot spots on feet, less power transfer, foot fatigue |
| Clothing | Padded bib shorts | Saddle soreness that can sideline you for days |
Finally, get a floor pump with a pressure gauge. Hand pumps are for emergencies. Tire pressure is dynamic; for a rider around 80kg on standard 700x25mm tires, a safe start is 90psi in the front and 100psi in the rear. Under-inflated tires feel sluggish and risk pinch flats. Over-inflated ones transmit every bump and lose grip. Check the sidewall for the maximum pressure and stay 10-15psi below it.
The 5 Core Skills Every New Rider Needs
Fitness follows skill. Mastering these five actions turns the bike from a complex machine into an extension of your body. Drill them in a safe, empty lot before you ever plot a long route.
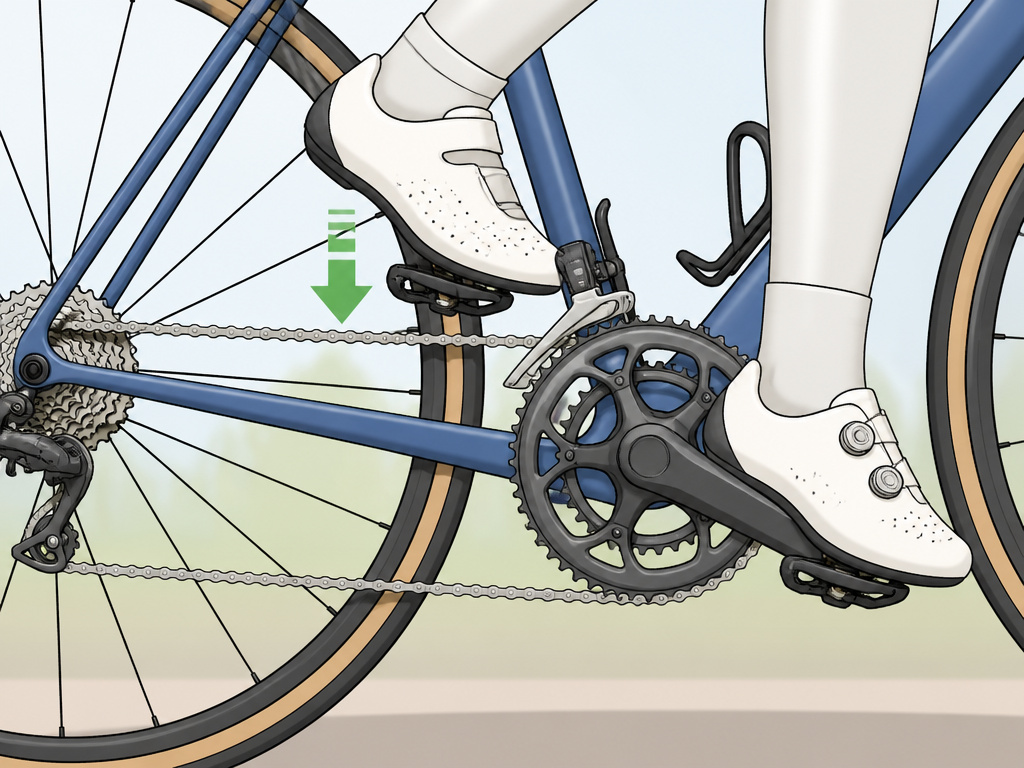
1. Clipping In & Starting Smoothly. The fear of falling over is real. The fix is physics. Find a flat, paved stretch. – Stand over the bike, hands on brakes. – Clip one foot in and rotate that pedal to the 2 o’clock position. – Look ahead, push down on the clipped-in foot, and lift onto the saddle as you coast. – Pedal a few strokes with the unclipped foot before worrying about clipping the second foot in.
Common mistake: Trying to clip both feet in while stationary. You need forward momentum to stay upright. Get rolling first, then clip in the second foot once you’re at a comfortable speed.
2. Braking Modulated, Not Slammed. Modern disc brakes are powerful. Treat them like a dimmer switch, not an on/off toggle. – Squeeze the levers progressively. Practice slowing to a near-stop without locking the wheels. – Use both brakes together, with slightly more pressure on the front (about 70/30 front/rear). The front brake provides most of your stopping power. – If you need to stop abruptly, shift your weight back over the rear wheel to avoid going over the handlebars. Squeeze, don’t grab. That’s the feel you’re after.
3. Shifting Without Cross-Chaining. Your drivetrain has a front derailleur (chainrings) and a rear derailleur (cogs on the cassette). Cross-chaining means using the big chainring with the biggest rear cog, or the small chainring with the smallest rear cog. This stretches the chain diagonally at an extreme angle. The chain rubs against itself and the front derailleur cage. Wear accelerates. The chain is more likely to derail. Shift in anticipation. As the road tilts up, shift to a smaller chainring before you’re grinding. Aim for a cadence between 80-100 revolutions per minute, a brisk, spinning pace that saves your knees.
4. Cornering with Control. You don’t steer a bike through a corner as much as you lean it. – Slow down before the turn. Braking mid-lean can cause the wheels to slide. – Look through the turn to where you want to exit. Your bike goes where your eyes are fixed. – Inside pedal up (to avoid striking the ground), outside pedal down with weight on it. – Lean your body with the bike, keeping your torso relatively centered.
5. Drinking & Eating On The Move. Dehydration and bonking (running out of energy) sneak up on you. – Practice taking your bottle out of the cage and returning it while rolling straight on a quiet road. Keep your head up. – For food, open wrappers before you ride. Tear a gel’s tab with your teeth. – Consume little and often, about every 20-30 minutes, not just when you feel thirsty or hungry.
Road Safety: Your Lane Position Is Your Lifeline
Confidence in traffic comes from predictable, visible positioning. The most dangerous place you can ride is in the gutter.
The part nobody mentions: Riding too close to the curb encourages drivers to squeeze past you in the same lane. Taking a firm, central position in the lane (called “taking the lane” or “primary position”) forces drivers to change lanes completely to pass. This is often safer than being overtaken with inches to spare.
At intersections, be predictable. Signal your intentions clearly with arm signals. Make eye contact with drivers when possible. Assume a driver waiting to turn hasn’t seen you until you have confirmation. For night riding, a good headlight (like a Cygolite Metro series) and taillight are mandatory. The headlight helps you see, the taillight helps you be seen. Consider reflective ankle bands or a reflective vest.
Your first rides should be on quiet residential streets or dedicated bike paths. Use apps like Komoot or Strava to find popular, beginner-friendly routes in your area. The goal is to minimize traffic interactions while you build handling skill.
Your First 30 Days: A Progressive Plan
 This plan prioritizes skill acquisition over mileage. Repeat each week’s focus until it feels automatic.
Week 1: Foundation. Two or three 30-minute sessions in a safe, car-free area. Practice: – Mounting, clipping in one foot, and getting rolling. – Smooth stops using both brakes. – Riding in a straight line while looking over your shoulder. – Drinking from your bottle without swerving.
Week 2: Introduction to Gears. Take a 45-minute ride on a quiet road with a gentle, sustained hill. – Practice shifting to maintain that 80-100 rpm cadence on the climb. – Descend the hill, focusing on controlled speed in the drops. – Actively avoid cross-chaining combinations.
Week 3: Integration. A 60-minute loop incorporating everything. – Practice signaling and scanning at every intersection, even if empty. – Find a wide, safe corner and practice the look-lean-press sequence. – Eat a snack on the bike halfway through the ride.
Week 4: Consolidation & Distance. Two 75-minute rides. – Choose a route with mild traffic. Practice holding your lane position confidently. – Focus on consistent effort and fueling. – By the end of the month, clipping in, shifting, and braking should require little conscious thought.
Navigating Common Beginner Pitfalls
 Everyone makes mistakes. Knowing these ahead of time saves frustration.
Saddle Height. A too-low saddle hurts your knees and wastes energy. A good starting point: with your heel on the pedal at the bottom of the stroke, your leg should be straight. When you ride with the ball of your foot on the pedal, you’ll have a slight bend. Tire Pressure Neglect. Check pressure before every ride with your floor pump. Temperature changes affect it. A 10°F drop can lose you 5-10 psi.
Ignoring Mechanicals. Learn to fix a flat tire before you need to. Carry a spare tube, tire levers, a mini-pump, and a multi-tool. A five-minute practice session in your garage is worth ten panicked minutes on the roadside.
Trying to Keep Up. Group rides are fantastic, but your first one should be a designated “no-drop” beginner ride. The pace should feel conversational. If you’re breathing too hard to talk, you’re in the wrong group. The cycling community is incredibly supportive to new riders; find your local shop’s weekly beginner ride and introduce yourself.
Frequently Asked Questions
What type of road bike is best for a complete beginner?
An endurance road bike. Models like the Trek Domane AL, Specialized Allez, or Giant Contend are designed with a more relaxed riding position, smoother-rolling tires, and stable handling. They’re more comfortable for longer rides as you build fitness. Avoid aggressive race geometries for your first bike.
How do I get over the fear of clipping into pedals?
Practice clipping in and out while holding onto a wall or doorframe. Then, on a soft surface like grass, practice the roll-and-clip sequence until the motion is muscle memory. The key is committing to that first downstroke to generate momentum, a stationary bike will always fall. Start every ride on a quiet, flat stretch.
Is road cycling safe with all the traffic?
It can be very safe when you ride predictably and visibly. Control your lane position, use lights day and night, obey traffic laws, and wear high-visibility colors. Most accidents happen at intersections, so scan aggressively and make eye contact. Start on low-traffic routes and expand your comfort zone gradually.
What should I wear for my first road cycling ride?
At a minimum: a MIPS helmet, padded cycling shorts, a moisture-wicking athletic top (not cotton), and sunglasses. Cycling-specific jerseys and gloves are the first upgrades you’ll appreciate for their storage pockets and padded palm protection. You don’t need the full kit, but the right shorts and helmet are non-negotiable for comfort and safety.
How often should a beginner ride?
Aim for 2-3 times per week. Consistency beats a single long ride. Start with 30-45 minute sessions focused on skill, not speed or distance. Listen to your body, muscle soreness is normal, but joint pain is a signal to check your bike fit or technique. Rest days are when your body adapts and gets stronger.
How do I find other beginners to ride with?
Check with your local bike shops. Most host weekly group rides and often have a dedicated “beginner” or “no-drop” ride. Online communities on Facebook or Meetup are also great resources. Riding with others slightly more experienced is one of the fastest ways to learn route selection, pacing, and group etiquette.
Before You Go
Road cycling rewards the prepared. Your first investment is in knowledge and core skills, not carbon. Get the bike fit right, master the five fundamental skills in a safe space, and let a structured 30-day plan build your confidence from the ground up. Traffic becomes manageable when you ride with purpose and predictability. Now, pump those tires, clip in, and go enjoy the ride. The road is waiting.
