
How to Prevent RV Pipes From Freezing: A Proven Winter Plan
This post contains affiliate links. As an Amazon Associate, we earn from qualifying purchases.
To prevent RV pipes from freezing, you need a three-layer defense: active heating for pipes and tanks, a thermal air barrier under the rig, and forced heat into dead zones behind cabinets. Relying on the propane furnace or the manufacturer’s “arctic package” leaves the underbelly vulnerable at 25°F, and a single night at 28°F can crack a pipe joint. The repair cascade starts at $500 and climbs fast.
The 28°F threshold is the mechanical fact that changes everything. Water expands 9% when it freezes, and the weakest joint in your PEX line gives way first. This isn’t about comfort; it’s about preventing a physical failure that happens on a predictable timeline.
What follows is the hierarchy that actually works when the forecast dips: which tools to buy, where to place them, and the two myths that cost owners thousands every spring. By the end, you’ll know the exact sequence to follow whether you’re winter camping or storing the rig for the season.
Key Takeaways
- Pipes begin to crack at 28°F; holding tanks split below 10°F. Your propane furnace does not heat the underbelly plumbing.
- Self-regulating heat tape on pipes and electric tank heater pads are non-negotiable for active winter use below 25°F.
- Skirting (vinyl or DIY foam board) creates a thermal air pocket that can raise the underbelly temperature by 10-15°F, preventing most tank freezes.
- “Arctic” or “4-season” packages from manufacturers are not rated for hard freezes; they lack sufficient heat in the underbelly.
- Skipping winterization leads to a predictable repair cascade: burst lines ($500+), cracked tanks ($1,500+), and a totaled water heater ($800+).
The 3-Step Freeze Defense Hierarchy
Forget the vague advice. Effective freeze prevention follows a mechanical order, addressing the most vulnerable points first. The system fails in a sequence: exterior hoses, then low-point drains, then belly pan plumbing, then holding tanks.
Your goal is to break that sequence at the first step you can control.
Water expands 9% in volume when it freezes. The resulting pressure doesn’t distribute evenly—it finds the weakest point in your plumbing system, usually a joint or a bend in the PEX line, and splits it. This cracking can occur at approximately 28°F with sustained exposure.
Step 1: Actively Heat the Pipes and Tanks
Passive insulation only slows heat loss. For temperatures consistently below freezing, you need to add heat directly to the components that hold water.
Self-regulating heat tape is the default for water lines. Unlike constant-wattage tape, it adjusts its electrical resistance (and heat output) based on the surrounding temperature. It won’t overheat and melt PEX piping if installed correctly. Wrap it around the fresh water inlet hose and any exposed PEX lines you can access in the underbelly or utility bay.
Electric tank heater pads adhere to the bottom of your fresh, gray, and black water tanks. They’re thermostat-controlled, kicking on around 40°F. For rigs with enclosed underbellies, these pads are often the only thing preventing a catastrophic tank split during a multi-day cold snap.
Step 2: Create a Thermal Air Barrier (Skirting)
Wind stripping heat from the underbelly is your biggest enemy. Skirting blocks that wind, trapping a pocket of still air that acts as a massive insulator.
| Skirting Type | Best For | Effective Down To | The Catch |
|---|---|---|---|
| Custom Vinyl (e.g., AirSkirts) | Snowbirds, weeks-long stays | 0°F | Significant investment ($1,200+). |
| DIY Foam Board | Stationary winter storage, budget-focused | -10°F | Permanent feel; requires careful sealing. |
| Emergency Wrap (Bubble Wrap + Tarp) | Unexpected cold snaps while traveling | 25°F | Temporary only; lasts days, not months. |
The most common mistake is leaving the front of the rig, around the hitch, unskirted. That’s where 70% of the cold air infiltration happens. Even a crude barrier of foam board and duct tape across the front makes a dramatic difference.
Where this goes sideways: Assuming your interior propane furnace heats the tanks. It doesn’t. The furnace ducting to the underbelly is minimal and ineffective below 25°F. The belly pan and tanks are separate, unheated spaces.
Step 3: Force Interior Heat Into Dead Zones
Your plumbing runs inside walls and behind cabinets against the RV’s outer shell. These are dead zones where interior air doesn’t circulate.
- Open all cabinet doors that conceal plumbing (under sinks, around the toilet).
- Use a small, fan-forced electric heater pointed at these open cabinets. A 400W ceramic heater on low can raise the local temperature 15-20°F.
- Let faucets drip. A tiny, continuous flow through the pipes makes it much harder for ice to form and block the line. This is a last-resort tactic for when active heating fails.
This three-step hierarchy is for preventing freeze while you’re using the RV. If you’re storing it, you need a different protocol: full winterization.
Why “Winterize” Means Draining and Filling with Antifreeze
Winterization isn’t just blowing out the lines. It’s the process of preparing the water system to sit idle in freezing conditions without damage. The standard method is drain, blow, and fill with RV-grade antifreeze.
Here’s the critical path, drawn from OEM manuals like the one for the Truma AquaGo system in Off Grid Engineering trailers:
- Drain Everything. Open all low-point drains and the fresh water tank valve. Pull the water heater drain plug. Let gravity do its work for 30 minutes.
- Bypass the Water Heater. Locate the water heater bypass valve (usually a set of three valves) and turn it to the bypass position. This prevents 6-10 gallons of expensive antifreeze from filling the heater tank.
- Blow Out Residual Water. Connect an air compressor (set to 40-50 PSI max) to the city water inlet. Open each faucet, hot and cold, until only air comes out. This step is what most DIYers skip, and the leftover water dilutes the antifreeze.
- Pump in RV Antifreeze. Connect the water pump’s suction hose to a jug of pink, non-toxic RV antifreeze. Turn the pump on and open each faucet until pink fluid flows. Do the toilet last.
- Protect Drains and Tanks. Pour one cup of antifreeze into each sink and shower drain (the P-trap). Pour another cup into the toilet and flush it into the black tank.
Common mistake: Using automotive antifreeze. It’s toxic and will contaminate your potable water system. The Airstream Atlas manual, like all others, specifies “non-toxic RV antifreeze” for a reason.
TL;DR: Winterization replaces water with antifreeze in every nook of the plumbing. Half-measures leave water in low spots, and that’s what freezes and breaks things.
The Tools and Parts You Actually Need
You don’t need a shop full of gear. These are the specific items that make the job reliable.
- Self-Regulating Heat Tape: Frost King or EasyHeat brands are common. Get enough to wrap your inlet hose and at least 3-5 feet of accessible interior piping.
- RV Antifreeze: Sold as “pink” or “non-toxic” propylene glycol. Plan for 2-4 gallons for a full winterization of a mid-size rig.
- Air Compressor & Blow-Out Plug: A small pancake compressor works. The blow-out plug is a cheap adapter that screws into your city water inlet.
- Water Heater Bypass Kit: If your RV isn’t pre-plumbed with one, a Camco bypass kit is a standard add-on.
- Digital Multimeter: For checking that your heat tape and tank pads are receiving power. Don’t guess.
Naming these tools matters. A “battery maintainer” like the Battery Tender Plus is also critical for winter storage, but it’s for the house batteries, not freeze prevention. Keep those systems separate in your planning.
If You’re Winter Camping: The Propane Math You Must Know

Choosing to camp in the cold means accepting a new variable: propane consumption. Your furnace is a gas hog.
A typical 30,000 BTU RV furnace will burn through a standard 30-lb propane tank in roughly 30-40 hours of cycling operation. In real terms: – At 20°F outdoor temp, that’s about 5-7 days of coverage. – At 0°F, expect 3-4 days per tank.
The factory propane gauge is notoriously unreliable. The float sticks. Do not trust it.
Worth knowing before you start: Always travel with two full propane tanks in winter. Know your next refill location (U-Haul, Tractor Supply) before you need it. A digital tank scale or a magnetic strip gauge is a $10 lifesaver.
This math forces a decision. Relying solely on the furnace for pipe protection is expensive and risky. It’s why skirting and heat tape on shore power are the smarter foundation for extended cold-weather stays.
What “Arctic Package” Really Means (And Doesn’t)
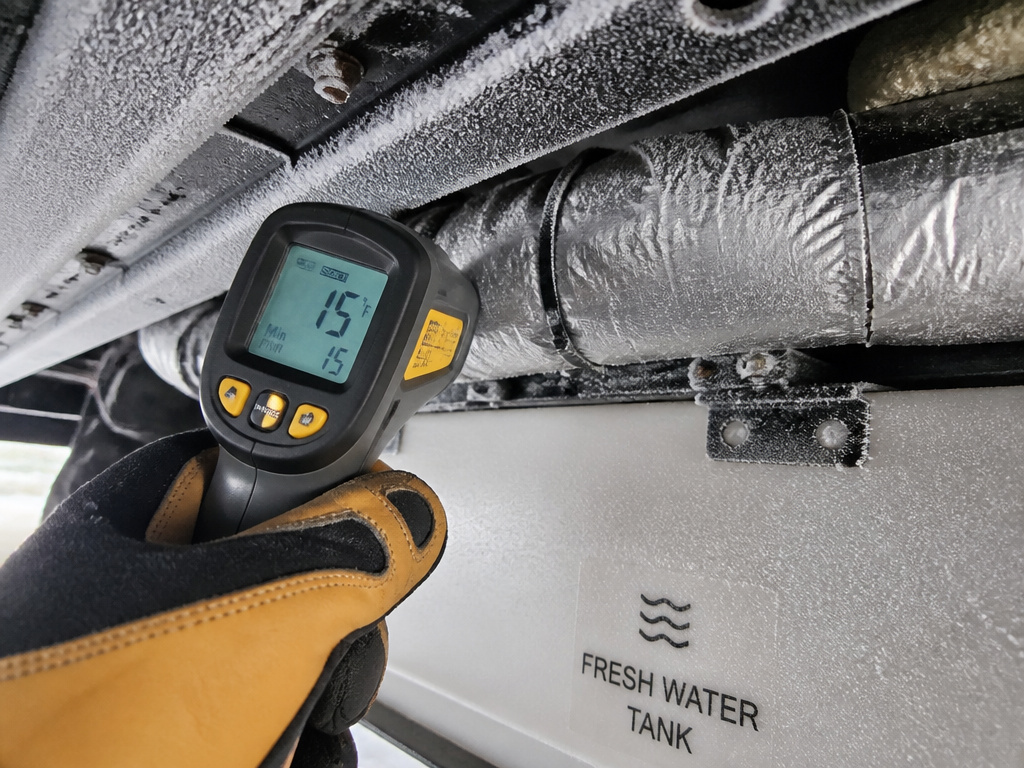
Manufacturer brochures love this term. On a premium rig like an Airstream Interstate, the “arctic package” typically means double-pane windows and an enclosed underbelly with some rudimentary heating ducts run to the tank area.
It does not mean the rig is rated for -20°F.
The reality, documented in user reports, is that most “arctic-rated” rigs will still freeze hard if exposed to 10°F for 24 hours or more. The enclosed underbelly just slows the cooling; it doesn’t provide active heat. The ducts from the interior furnace are too small and lose too much heat through the floor to keep water liquid in deep cold.
Don’t let a marketing term become a $3,000 assumption. Your RV’s freeze protection needs are determined by the forecast, not the sales sheet.
Frequently Asked Questions
At what temperature do RV pipes freeze?
RV pipes can begin to freeze as soon as the air hits 32°F, but it usually takes several hours of sustained cold for a solid blockage. The dangerous threshold is 28°F—that’s when expanding ice creates enough pressure to crack pipe joints and fittings.
Can I just leave my propane furnace on to prevent freezing?
No. The furnace heats the interior living space, not the underbelly where the tanks and much of the plumbing reside. The small ducts routed to the underbelly are ineffective below 25°F. You’ll burn through propane without protecting your pipes.
Is heat tape safe for plastic PEX pipes?
Yes, if you use self-regulating heat tape rated for plastic/PEX piping. This type automatically reduces its heat output as it warms, preventing hotspots that could melt the pipe. Never use constant-wattage heat tape on PEX unless the manufacturer explicitly permits it.
How much does it cost to fix frozen RV pipes?
The damage cascades. A single burst PEX line: $500-$1,500. A cracked fresh water tank: $1,500-$3,000. A ruptured water heater tank: $800-$1,500. Total repairs often land between $3,000 and $8,000. Comprehensive insurance may cover it, but only if you took “reasonable steps” to prevent the freeze.
What’s the difference between winterizing and freeze prevention?
Winterizing is for storage: you drain all water and fill the lines with antifreeze so the rig can sit uninhabited in the cold. Freeze prevention is for active use: you keep water in the system but use heat tape, skirting, and interior heat to keep it from freezing while you live in the RV.
The Bottom Line
Preventing frozen RV pipes isn’t about buying the most expensive rig with an “arctic” label. It’s about applying physics: water expands at 28°F, wind strips heat, and still air insulates.
The plan is simple. For storage, follow the full winterize an RV drill with antifreeze. For camping, layer active heat (tape and pads), block the wind (with skirting), and circulate warm air to dead zones. Ignore the furnace’s false promise and skip the vodka-in-the-pipes folklore. Your tools are specific, and their job is to fight a predictable enemy: the temperature reading on your phone.
