
Using a Breaker Bar to Remove Tires: Easier or Dangerous?
This post contains affiliate links. As an Amazon Associate, we earn from qualifying purchases.
A breaker bar with a dedicated bead-breaking attachment is easier for the initial bead separation on light truck and passenger tires, but it is also the tool most likely to gouge your rims and void warranty coverage. For safe, non-destructive removal, a powered tire changing machine with a bead-breaking roller is the only method endorsed by vehicle manufacturers.
That “easier” is a trade-off. It trades your time and sweat for a high probability of physical damage to the wheel’s bead seat. The tool that makes the hard part simple is the same tool that leaves deep scratches in alloy or cracks the clear coat on aluminum, inviting corrosion.
What follows is the split in the industry: the manual tool instructions that show you how, versus the official service manuals that tell you not to. We’ll walk through the two types of bead breakers, the OSHA rule that governs the big ones, and the one step every manual assumes you’ll skip (and the damage that follows when you do).
Key Takeaways
- Vehicle manufacturers like GM explicitly warn against using hand tools or tire irons alone for tire removal, stating damage to the bead or rim will result.
- A proper bead breaker is a dedicated tool, either manual or hydraulic, designed to separate the tire bead from the rim flange without leveraging against the rim’s finish.
- OSHA regulation 29CFR1910.177 mandates specific training for anyone servicing multi-piece wheels, highlighting the lethal danger of improper bead breaking.
- Using a pry bar or improper tool scratches the bead seat, which can cause slow air leaks, corrosion under clear coats, and improper tire seating.
- The only universally safe method for modern wheels is a professional tire changing machine with a powered bead-breaking roller and protective toolheads.
What Exactly Is a Bead Breaker?
Forget the generic breaker bar in your socket set. In tire work, a “breaker bar” almost always refers to a bead breaker, a dedicated tool for prying the tire’s hardened wire bead away from the wheel’s flange.
You have two broad categories. The manual type, like the one included with the Harbor Freight Tire Changer (Model 58731), uses a long steel handle and a shoe that presses against the tire’s sidewall. You leverage it down, and the shoe pushes the bead off the rim. The hydraulic type, like the AME International Model 11000, uses a 10,000-psi pump to drive a ram that does the same job with vastly more force for earthmover tires.
A bead breaker applies force directly to the tire’s sidewall and bead, transmitting it through the rubber to break the seal against the rim. A pry bar applies force to the rim’s edge itself, using it as a fulcrum. That’s the difference between un-sticking something and using the thing you don’t want to damage as your lever.
The manual kind works well enough for basic steel wheels. The force is controlled, and the shoe is meant to protect the rim. But the margin for error is thin. Angle the shoe wrong, or have a rim with a delicate finish, and you’ve just traded minutes of saved effort for a permanent gouge.
The Official Warning You Won’t Find in a Manual
Open the service manual for a 2018 GMC Sierra or a 2011 Chevrolet Colorado. The instruction is identical and unambiguous.
Use a tire changing machine in order to dismount tires. Do not use hand tools or tire irons alone in order to remove the tire from the wheel. Damage to the tire beads or the wheel rim could result.
This isn’t a suggestion. It’s a formal Caution statement from the engineering team that designed the wheel. They know that the bead seat, the precise machined surface where the tire seals, is easily marred. A scratch there doesn’t just look bad. It can create a path for air to seep out or for moisture to get under a wheel’s clear coat, starting a corrosion bubble that spreads.
| Tool/Method | What It’s Good For | The Specific Risk |
|---|---|---|
| Professional Tire Changer (e.g., 7108-M014-01) | Alloy wheels, low-profile tires, preserving finish. | Almost none when operated correctly. The bead-breaking roller applies even, rim-safe force. |
| Manual Bead Breaker (e.g., Harbor Freight 58731) | Basic steel wheels, farm equipment, where finish is irrelevant. | Scratching the rim flange if the shoe slips; insufficient force for stiff, modern tire beads. |
| Pry Bar / Improvised Lever | Emergency field repair only. | Guaranteed damage to the bead seat, potential to bend the rim flange, and high risk of personal injury. |
The warning exists because the cost of a tire changing machine is trivial compared to the cost of a single replacement alloy wheel. The machine uses a roller to press the bead down and away, and a toolhead that’s designed to slide between the tire and rim without metal-to-metal contact.
How a Real Tire Machine Does It (And Why It’s Different)
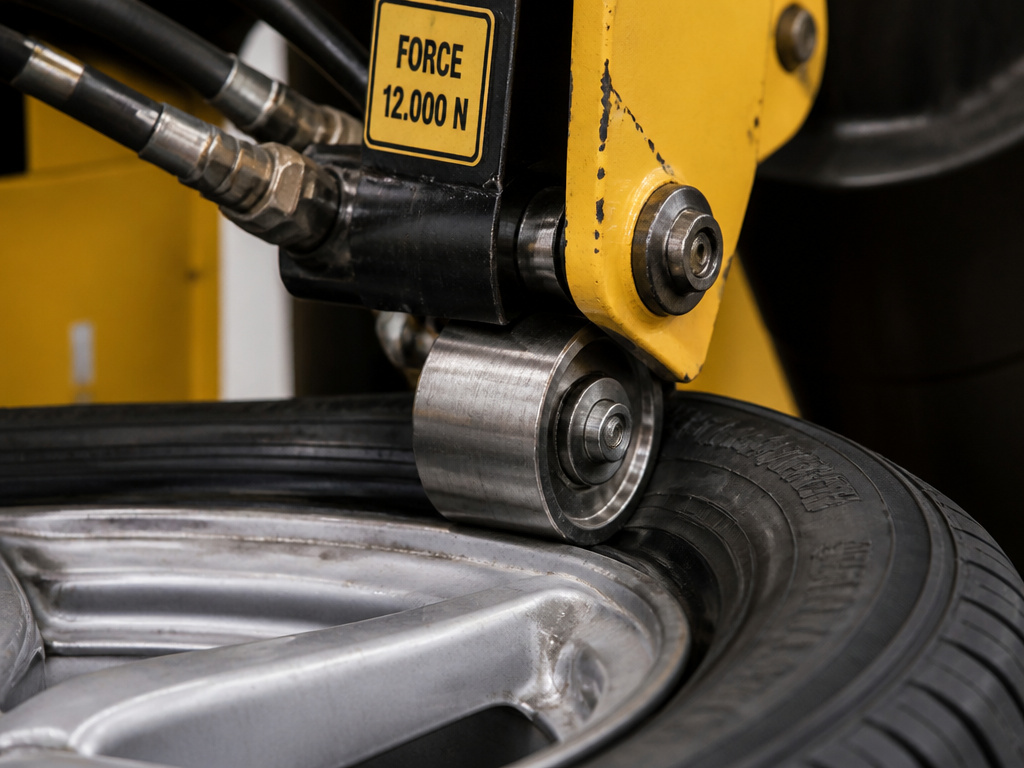
A professional tire changer doesn’t “break” the bead in the prying sense. It coaxes it. Take the Tyre Changer Model 7108-M014-01. Its bead-breaking roller applies 12,000 N (about 2,700 lbs) of force at 10 bar of air pressure, spreading that force along the tire’s sidewall.
The machine rotates the wheel, walking the roller around the entire circumference. This evenly separates the bead without concentrating stress on one spot of the rim. Once the bead is “broken” on both sides, the demounting toolhead, often clad in plastic, is inserted. The wheel spins, and the toolhead guides the bead up and over the rim flange.
Where this goes sideways: Skipping the lubricant. Manuals for professional machines stress lubricating the drop centre and bead. On a stiff tire, dry friction between the toolhead and rubber can actually tear the tire’s inner liner, creating a slow leak you won’t find until the tire is mounted and balanced.
The process is slow, methodical, and kind to components. It’s the opposite of the impact-driven, leverage-based approach of a manual breaker bar. This is why shops use them: speed comes from consistency and lack of rework, not raw force.
The Heavy-Duty Exception: OSHA and the Big Rigs
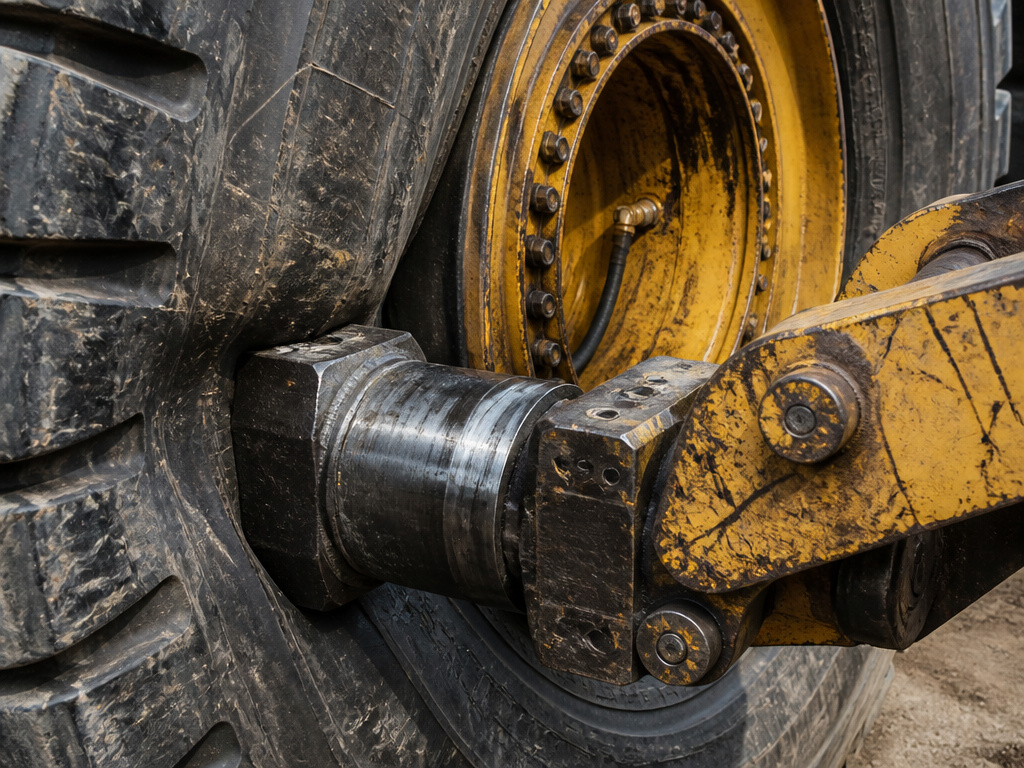
For the massive multi-piece wheels on mining trucks and heavy equipment, the manual versus machine debate is irrelevant. The only tool for the job is a hydraulic bead breaker like the OTR-2000E or AME International 11000, and its use is governed by federal law.
OSHA regulation 29CFR1910.177, “Servicing Single-Piece & Multi-Piece Wheels,” is not a guideline. It is a mandatory training and procedure standard. The reason is lethality. A stuck bead on a 49-inch rim holding 100 psi is an enormous store of energy.
The procedure is meticulous: 1. Chock, jack, and crib the vehicle. 2. Deflate completely, remove the valve core and verify with a wire. 3. Position the bead breaker at least 12 inches away from the flange butt weld (the weakest point on the rim). 4. Stand to one side while operating the ram.
Before you start: The tire must be fully deflated. Not low. Deflated. An under-inflated multi-piece tire can still explode with enough force to kill when a bead breaker clamp shifts. The manual states this as a DANGER, not a caution, for a reason.
These tools are easier in the sense that human strength is irrelevant. A 15-ton ram does the work. But “easier” here means “the only possible way without dying,” not “more convenient.” It’s a different universe from swapping your SUV’s summer tires.
The Step-by-Step Reality of a Manual Bead Breaker
Let’s say you’re working on an old trailer wheel with a basic steel rim. The Harbor Freight Model 58731 manual provides a clear, step-by-step process. Following it exactly is the only way to minimize risk.
- Deflate the tire. Press the core remover on the valve stem until you hear no hiss.
- Apply bead lubricant or soapy water to the bead area. This is the step everyone skips. Dry rubber binds to metal.
- Position the wheel against the changer’s mounting tab, valve stem up.
- Set the breaker shoe against the rim’s edge, not the tire sidewall.
- Press the handle down steadily. You’ll feel a pop as the bead unseats.
- Rotate the wheel and repeat every few inches until the entire top bead is free.
- Flip the wheel and repeat for the bottom bead.
What happens if you skip step 2? The rubber grips the rim. You apply more force. The breaker shoe slips off the rim edge and digs into the wheel’s painted surface. On an aluminum wheel, this cracks the clear coat. You’ve now made the wheel more likely to corrode and the tire harder to seal next time. The five seconds you saved cost you a $300 wheel.
Frequently Asked Questions
Can I use a regular pry bar instead of a bead breaker?
You can, but you absolutely shouldn’t on any wheel you care about. A flat pry bar uses the delicate rim flange as its fulcrum. It will dent, bend, or scratch it. This is the specific practice GM’s service manual warns against, stating damage is guaranteed. Reserve pry bars for absolute emergencies in the field.
Are manual bead breakers safe for alloy wheels?
No. Most manual bead breaker shoes are made of hardened steel. Even with perfect technique, the risk of the shoe slipping and gouging the soft aluminum is high. The factory clear coat is easily compromised. The safe answer for alloy wheels is always a professional tire machine with protective toolheads and a roller breaker.
What’s the OSHA rule for tire changing?
OSHA 29CFR1910.177 requires employers to ensure personnel servicing large, multi-piece rims are trained in specific procedures: safe deflation, proper use of bead-breaking equipment, ring removal, and inspection. This training is mandatory because failures can be fatal. It underscores that “easier” is not the goal, “safe” is.
Why do my new tires feel slippery?
New tires have release agents from the mold that remain on the tread surface. This is different from the concerns of mounting. For the first 50-100 miles, new tires have reduced grip, especially in wet conditions. You should scrub them in gently, not because they were mounted wrong, but because the rubber itself needs to wear in. Check our article on why new tires are slippery for the full breakdown.
How does tire age affect safety?
Age is a separate but critical factor. Rubber deteriorates over time due to oxidation, regardless of tread depth. A 10-year-old tire with full tread can have cracked sidewalls and weakened internal belts. This is a major safety risk of old tires that is independent of how the tire is mounted or removed.
Before You Go
So, are breaker bars easier to remove tires? For the first pop of the bead on a disposable rim, yes. For everything else, preserving your wheels, following manufacturer dictates, ensuring a safe seal, they are a shortcut that leads directly to a repair bill.
The professional standard exists for a reason. A tire machine applies controlled, rim-safe force. It’s the difference between surgery and blunt force trauma. Your wheels are precision parts. Use the right tool.
If you’re considering a tire change because of wear, remember that the condition of the tire itself is the first safety check. Whether you’re concerned about bald tires or the cracks of dry rotted tires, the removal method should never introduce a new hazard. Sometimes, the easier way is the one that doesn’t leave a mark.
