
For Beginners: Are Clipless Pedals Worth the Challenge?
This post contains affiliate links. As an Amazon Associate, we earn from qualifying purchases.
For most beginners, clipless pedals are not worth the initial hassle, cost, and risk of falls unless your specific riding goal demands them. The actual efficiency gain for casual riding is marginal (around 5% more power), but the secure connection can provide crucial knee relief on longer rides. The investment only pays off if you’re willing to spend 1-4 weeks practicing in a parking lot before hitting the road.
That marginal power gain comes from a University of Nevada study. The researchers measured a 5.3% increase in output with clipless pedals versus flats. Heart rate was higher with flats, meaning riders worked slightly harder for less result.
The catch is the timeline. That efficiency only matters if you’re riding far enough, often enough, for it to add up. If your rides are under ten miles a few times a week, a 5% difference gets lost in traffic lights and stop signs. The real payoff for beginners isn’t raw speed, it’s joint protection. A locked-in foot position stops your knee from wobbling side-to-side with each pedal stroke.
What follows is the equipment reality: the mandatory shoe purchase, the adjustment screws most people never touch, and the exact mileage when cheap cleats snap. We’ll map a beginner’s first month, from parking-lot drills to the first real hill climb, so you know exactly what you’re signing up for.
Key Takeaways
- Clipless pedals offer a measurable but small power boost (~5%) and significant knee protection, but require 1-4 weeks of dedicated practice to use safely.
- Start with the spring tension set to its absolute minimum and use pedals with float (like Shimano SPD) to make unclipping instinctual and reduce fall risk.
- Plastic road cleats (e.g., Shimano SPD-SL Yellow) wear out in 3,000-6,000 miles; worn cleats can release unexpectedly, especially when standing to climb.
- You must buy dedicated cycling shoes; using normal sneakers on clipless pedals is ineffective and dangerous.
- For pure beginners focused on urban commuting, fitness, or basic trail skills, quality flat pedals with stiff-soled shoes are a faster, cheaper, and safer starting point.
The Efficiency Myth vs. Knee Relief Reality
The promise of “more power” sells clipless pedals. A UNLV study is the source, showing clipless pedals delivered about 5% more power than flats in a controlled test. That number is real, but it’s not transformative for a beginner doing short, stop-start rides.
The mechanism is more about consistency than magic. Your foot stays in the same spot on the pedal, stroke after stroke. On flats, even a slight shift or slip wastes energy. The clipless system eliminates that micro-slip. It also lets you use slightly different muscles on the upstroke, smoothing the effort.
The primary benefit for new riders isn’t the power boost. It’s the elimination of lateral knee movement, which reduces strain on long rides. A foot that’s locked in place can’t twist, so your knee joint tracks straight.
The real efficiency story is about injury prevention, not personal records. If you have a history of knee pain or plan rides longer than 90 minutes, that stable foot position is a legitimate health consideration. For a beginner logging 30-minute fitness loops, it’s overkill.
A Beginner’s Month-Long Timeline
Forget “getting used to them.” Learning clipless pedals is a scheduled project. Most people need two to four weeks of deliberate practice before the unclip motion becomes automatic. The process isn’t linear, and it has specific failure points.
Week 1: Parking Lot Drills. This is non-negotiable. Find a empty lot, lean against a wall or pole, and practice clipping in and out fifty times on each side. Set the release tension on your pedals to the lightest setting, this is the adjustment screw most beginners ignore. The goal is muscle memory, not riding.
Week 2: Quiet Street Loops. Find a dead-end street with no traffic. Ride 100 feet, stop, unclip, put a foot down, clip back in, repeat. You will tip over at least once. It happens when you forget to unclip before stopping or panic and twist the wrong way. The falls are slow and embarrassing, not high-speed.
Week 3: Incorporating Starts and Stops. Now, add minor obstacles. Practice unclipping in anticipation of a stop sign you can see 50 yards away. Clip back in while rolling, not from a standstill. This week is where you learn to plan ahead, because the unclip decision can’t be made at the last second.
Week 4: The First Real Ride. If you’ve done the drills, you can now handle a proper ride. Your focus will still be split between riding and monitoring your feet, which means your handling skills will temporarily regress. Stick to familiar, low-traffic routes.
Where this goes sideways: Skipping the parking lot week. The first instinct is to “just go for a ride and figure it out.” That’s how you end up sprawled at an intersection with a bruised hip and a cracked derailleur hanger. The timeline assumes practice; without it, the risk period stretches for months.
The Mandatory Gear (And What Breaks First)
Going clipless means buying into a system, not just a pair of pedals. The shoes are the anchor point, and the cleats are the consumable part that fails on a schedule.
You need clipless-compatible cycling shoes. A stiff sole is critical, a soft sneaker will flex over the pedal, wasting energy and hurting your feet. For mountain or hybrid biking, look for shoes with recessed cleat mounts (like those for Shimano SPD) so you can walk somewhat normally.
| Component | Beginner Recommendation | What Happens If You Cheap Out |
|---|---|---|
| Pedals | Shimano SPD (PD-M520) or similar MTB-style | Harder to engage, less adjustable tension, poorer durability |
| Shoes | Stiff-soled MTB/ Hybrid shoes with recessed cleat mount | Foot fatigue, hot spots, inability to walk off the bike |
| Cleats | Manufacturer-branded (e.g., Shimano SH-51) | Imitation cleats snap under load—a Bicycling test rider broke fakes after 1,500 miles |
The cleats are the wear item. Plastic road cleats like the Shimano SPD-SL Yellow are good for 3,000 to 6,000 miles. Mountain bike cleats (Shimano SPD) last longer, from 8,000 to 15,000 miles. Wear isn’t just about slipping; an overly worn cleat can release unexpectedly when you stand up to climb. That sudden disengagement can throw you off balance into traffic or a trailside ditch.
Mud and debris are the other failure mode. A clogged pedal mechanism won’t engage or release cleanly. Mountain bikers learn to tap their pedals against a tire to knock muck loose before clipping in.
Clipless vs. Flat Pedals: The Five-Minute Decision Matrix
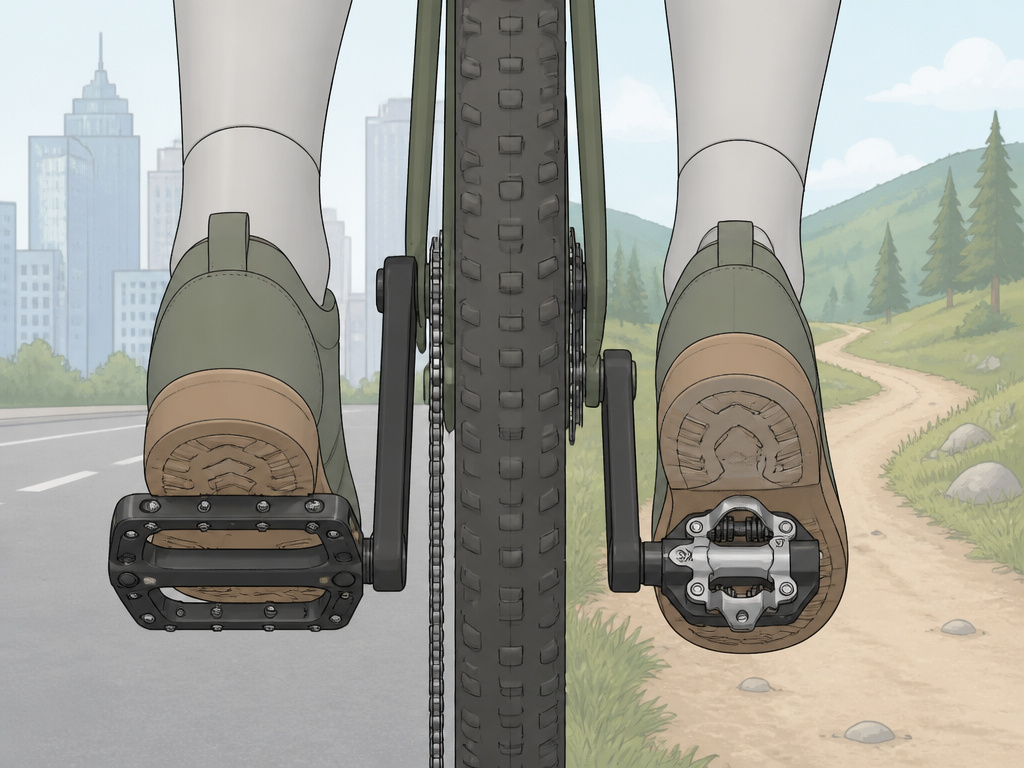
This isn’t a philosophical debate. Your riding style, budget, and patience give you a clear answer in about five minutes. Use this table to frame your choice.
| Rider Profile | Best Pedal Type | Primary Reason | Watch Out For | | :— | :— | :— | | Urban Commuter | Flat Pedals | Instant foot-down speed in traffic | Slick plastic pedals in rain | | Fitness / Casual Rider | Flat Pedals | Zero learning curve, use any shoe | Foot slipping on sweaty climbs | | Mountain Biker (Beginner) | Flat Pedals | Easy dabs and dismounts on tech trails | Lack of foot security on bumpy descents | | Roadie w/ Knee History | Clipless Pedals (with float) | Knee joint stability on long rides | Forgetting to unclip at stops | | Aspiring Road Racer | Clipless Pedals | Marginal power gain & group ride etiquette | High cost of shoes + pedals + cleats |
The Shimano PD-M520 is the default recommendation for a first clipless pedal. It’s a mountain bike pedal, which means it’s dual-sided (easier to clip into) and uses a recessed cleat system you can walk on. For a quality flat pedal, something like the RaceFace Chester offers a large, grippy platform.
If you’re buying your first real bike and plan to ride on paths or city streets, start with a good pair of flat pedals. You can always switch to clipless later. Starting clipless adds $150-$300 in upfront shoe and pedal costs on top of the bike price, plus that month of training.
Before You Start: The Safety Non-Negotiables
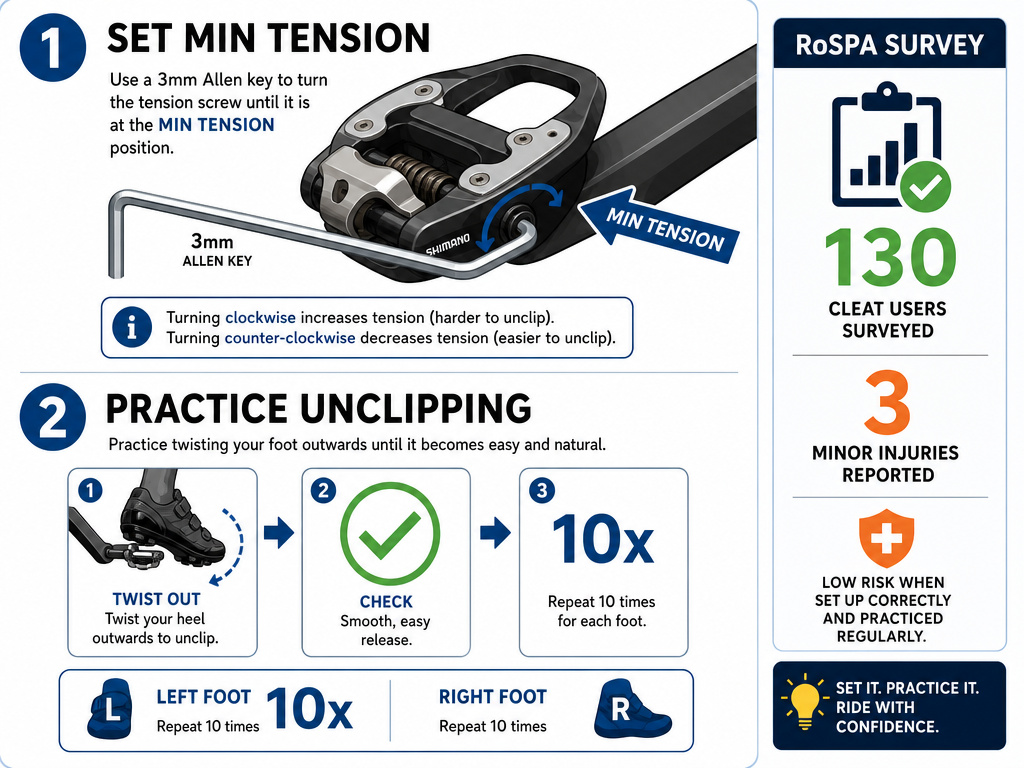
Working on a bike is one thing; modifying your connection to it is another. Two adjustments prevent the most common injuries.
- Set the release tension to minimum. Every clipless pedal has a small adjustment screw, usually requiring a 3mm Allen key. Crank it all the way to the loose setting. You can increase it later when the motion is automatic. A UK safety factsheet noted that improper tension is a key factor in clipless pedal falls, as riders discover they can’t release in an emergency.
- Practice the emergency release. Lean against a wall, clip in, and then deliberately panic-twist your heel outward. Do it ten times per foot. Your brain needs to know the escape route works when adrenaline hits.
A RoSPA survey of 130 cleat users found only three minor injuries directly attributed to cleats. Most clipless accidents are low-speed tip-overs, not crashes. The risk is embarrassment and a scraped knee, not a hospital visit, provided you adjust the tension and drill the release.
Frequently Asked Questions
Can you use clipless pedals with normal shoes?
No. The cleat mechanism requires a hard, compatible cleat bolted to the shoe sole. A normal sneaker will just slide around on the small pedal platform, offering less grip and control than a basic flat pedal. It’s inefficient and unsafe.
How long does it take to get used to clipless pedals?
For the unclipping motion to become instinctual, plan on 2-4 weeks of regular, deliberate practice. The first week should be off-road drills. After a month, most riders no longer think about their feet during normal riding, but may still hesitate in sudden panic stops.
What’s the difference between road and mountain bike clipless pedals?
Road pedals (like Look Keo or Shimano SPD-SL) are often single-sided with a large, exposed plastic cleat. They’re optimized for maximum power transfer but are awkward to walk in. Mountain bike pedals (like Shimano SPD) are dual-sided, use a small metal cleat that recesses into the shoe sole, and are easier to engage in messy conditions. Beginners should always start with a mountain bike style system.
Do clipless pedals really make you faster?
For a beginner, the speed difference is negligible on short rides. The proven gain is around 5% more power output, which matters in long races or sustained climbs. For new riders, any speed increase is more likely from improved fitness and technique than the pedals themselves.
How often do you need to replace cleats?
It depends on the type. Recessed mountain bike cleats (Shimano SPD) can last 8,000-15,000 miles. Plastic road cleats (Shimano SPD-SL Yellow) wear faster, typically needing replacement every 3,000-6,000 miles. Worn cleats feel loose in the pedal and may release unexpectedly under high load.
The Bottom Line
For a true beginner, someone still building basic bike handling skills and confidence, flat pedals are the right choice. They let you focus on riding, not on your feet. The investment in clipless pedals only becomes worthwhile when you have a specific, demanding goal that requires their particular benefits: long-distance knee protection, serious road training, or technical mountain biking where foot security is paramount.
If that’s you, start with a forgiving system like Shimano SPD, set the tension to minimum, and commit to the parking lot drills. The learning curve is steep but short. For everyone else, a good pair of flat pedals and stiff-soled shoes will get you rolling faster, cheaper, and with far less drama.
