
How to Shift Gears on a Bicycle Properly for Smooth Riding
This post contains affiliate links. As an Amazon Associate, we earn from qualifying purchases.
To shift gears on a bicycle properly, you must be pedaling forward, ease pressure on the pedals during the shift, and avoid pedaling backward after shifting or using extreme gear combinations like smallest chainring to smallest rear cog. The left shifter controls the front derailleur for larger changes (smaller chainring for easier gears), and the right shifter controls the rear derailleur for fine-tuning (larger rear cog for easier gears). Matching your pedaling cadence, a smooth 75–90 RPM, to the terrain is the goal, not just moving the chain.
That forward-pedaling requirement is the mechanical reality of how a derailleur moves the chain sideways. The system only works when the chain is moving forward under tension from your pedals.The first time a new rider tries to shift while coasting or pedaling backward, they feel the click but hear nothing happen. That’s the system waiting for the chain to move.
What follows: the physical reason front and rear shifting feel different, the exact gear combinations that eat your drivetrain, and the one maintenance interval every manual prints but most riders miss.
Key Takeaways
- Pedal forward to shift. The derailleur can only move the chain sideways when it’s moving forward. Clicking the shifter while coasting does nothing.
- Ease up during a front shift. The front derailleur pushes the chain against its own power path; forcing it under heavy load can bend the cage or throw the chain.
- Skip the extreme gear combos. Running the chain from the smallest chainring to the smallest rear cog (or largest to largest) creates a severe angle that accelerates wear and can cause a derailment.
- Check cable tension at 60 miles. The Santa Cruz manual specifies the first adjustment for cable stretch should happen after roughly 60 miles or six weeks of riding.
- Cadence is the target. Shift to maintain a smooth, efficient pedaling speed (75–90 RPM), not because you think you “should” use all the gears.
The Physics Behind the Click (Why It Works)
You feel a click, hear a clunk, and the chain jumps to a new gear. That process depends on two different mechanisms working together: the rear derailleur’s guided slack and the front derailleur’s powered shove. Understanding the difference explains why one is forgiving and the other is fussy.
The rear derailleur works on the bottom, slack section of the chain. Its spring-loaded pulleys keep tension, so it can guide the chain across the cassette even under some pedaling load. The legendary mechanic Sheldon Brown noted the rear derailleur can usually shift under full load, though easing pressure is smoother. The front derailleur is the opposite story. It shifts the top, power-delivering section of the chain. Shoving the chain sideways against the force of your pedal stroke is a hard job. Try it while mashing the pedals up a hill, and you’ll get a loud crunch, a missed shift, or a dropped chain.
The rear derailleur shifts using the bottom of the chain loop, which is under light tension from the derailleur’s pulleys and springs. The rear derailleur can usually shift under full load, but it is better for the chain to ease up a bit during the shift. The front derailleur shifts using the upper part of the chain, the part that transmits power to the rear wheel. As a result, the front shifting will not work so well while you are pedaling very hard, or slowly, or both.
That’s the rule of thumb: rear shifts are patient but robust; front shifts need a momentary pause in your power output. A quick half-pedal stroke with light pressure is all it takes.
TL;DR: Rear shifts can handle force but prefer grace. Front shifts demand you ease up for a second.
Shifter Layout and Cadence: What You’re Actually Controlling
Your left hand controls the front derailleur, moving the chain between the chainrings. Your right hand controls the rear derailleur, moving it across the cassette. The common “bigger = harder” memory aid works, but it’s clearer to think in terms of terrain and pedaling speed.
A lower, easier gear (small front chainring, large rear cog) is for climbing or accelerating. It makes each pedal stroke less powerful but easier to turn, letting you spin a faster cadence. A higher, harder gear (large front chainring, small rear cog) is for descents and speed. It demands more force per pedal stroke but covers more ground with each revolution. Your target should be a steady, efficient cadence, typically between 75 and 90 revolutions per minute (RPM). You shift to keep that rhythm as the road changes, not to use every gear on the bike.
Think of cadence like the RPM gauge in a car. You wouldn’t drive up a mountain in 6th gear with the engine lugging, and you wouldn’t scream down a highway in 1st gear. You shift to keep the engine, your legs, in its efficient, happy range. This is where focusing on your bicycle cadence pays off more than memorizing gear numbers.
| Control | Governs | “Easier” Gear Action | Best Used For |
|---|---|---|---|
| Left Shifter | Front Derailleur / Chainrings | Shift to smaller chainring | Major grade changes, steep climbs |
| Right Shifter | Rear Derailleur / Cassette Cogs | Shift to larger rear cog | Fine-tuning resistance, rolling terrain |
The Gear Combination Grid (What to Skip and Why)
Your bike may have 21, 24, or even 30 possible gear combinations. Most of them are usable. A few are destructive. This is called cross-chaining, and it has a specific, physical cost.
When the chain runs from the smallest chainring to the smallest rear cog, or from the largest chainring to the largest rear cog, it stretches diagonally across the bike. This extreme angle forces the chain links to articulate sideways as they mesh with the teeth, creating intense internal friction. The result is a distinctive whirring or grinding noise, accelerated wear on the chain and cogs, and a significantly higher risk of the chain dropping off.
Common mistake: Riding in the small-small combo because it feels like a “secret” easy gear. The extreme chain angle multiplies friction, and you’ll hear a high-pitched whine within a few miles. That’s the sound of metal grinding itself away.
Manufacturers are blunt about this. The Cannondale and Scott manuals explicitly warn against these combinations due to “unacceptable stress” and the potential for “serious damage.” The fix is simple: if you’re on the small chainring, stay on the larger half of the cassette. If you’re on the big chainring, stick to the smaller half. There’s plenty of gear range within those zones.
Step-by-Step Technique for a Perfect Shift
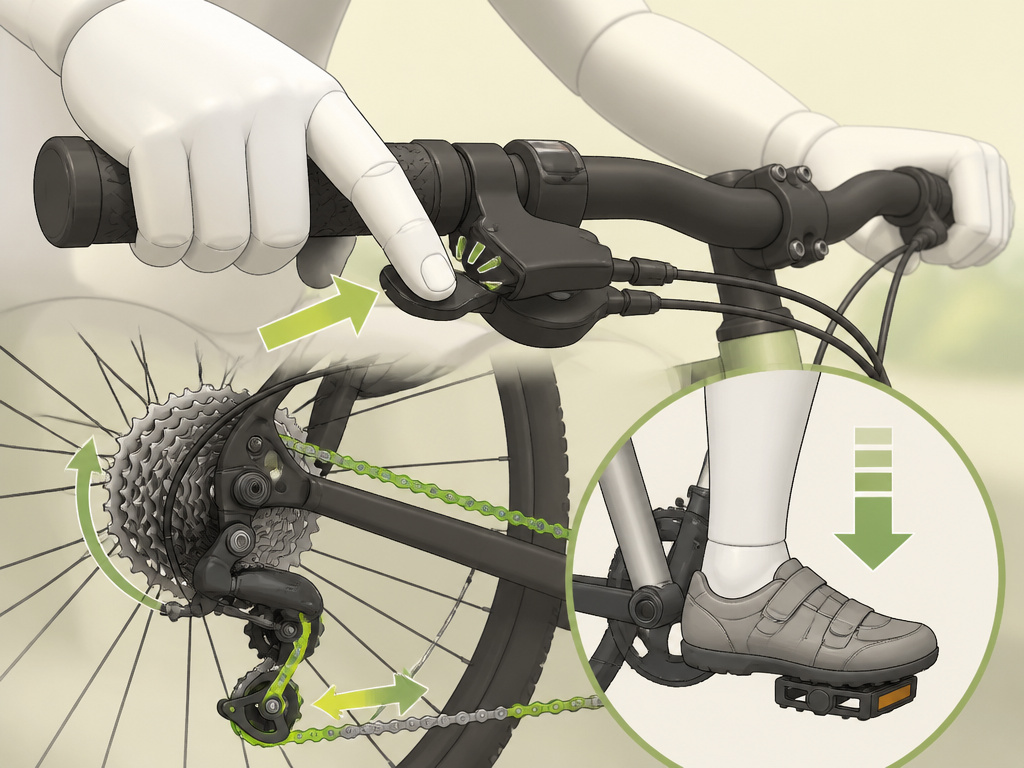
Knowing the theory is one thing. Executing it on a bumpy road with traffic is another. This sequence turns the physics into habit.
- Anticipate the terrain. Shift before the hill gets steep or the road flattens out. Trying to shift under maximum load is the leading cause of missed shifts and chain drops.
- Ease pedal pressure. Lighten the force on the pedals for one smooth revolution. You don’t need to stop pedaling, just unweight them slightly. This is non-negotiable for front shifts.
- Click the shifter decisively. While maintaining that light pressure, press or twist the shifter in one continuous motion. Don’t “feather” it. A single, firm click is what the mechanism expects.
- Complete the pedal stroke. Keep pedaling forward smoothly to allow the chain to fully settle onto the new gear. You’ll hear and feel the shift complete.
- Resume normal power. Once the shift is done and the chain is quiet, you can pedal normally again.
What happens if you pedal backwards after a shift? This is a critical warning straight from the OEM manuals. The derailleur has moved to a new position, but the chain hasn’t yet fully seated. Pedaling backward can instantly drag the chain into the derailleur cage or spokes, causing a jam that can break spokes, bend the derailleur hanger, or snap the chain. The Cannondale manual states this “could jam the chain and cause serious damage to the bicycle.” The rule is absolute: never backpedal immediately after clicking the shifter.
The One Adjustment Every New Bike Needs (And When)
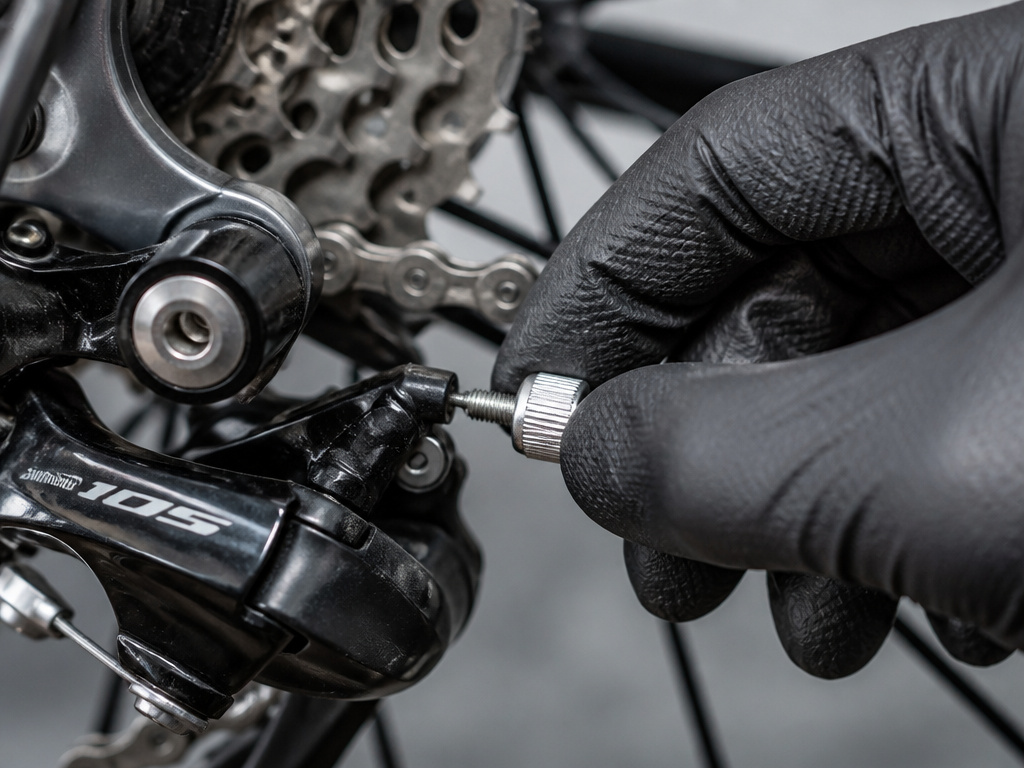
You can have perfect technique, but if the mechanical setup is off, shifting will always be clunky. The most common issue on a new bike is cable stretch.
Shift cables are steel, and under tension, they elongate slightly. This tiny stretch is enough to turn crisp shifts into vague, hesitant ones. It’s so predictable that the Santa Cruz User Manual specifies a first inspection after approximately 60 mi (100 km) or six weeks. This isn’t a full service; it’s a cable-tension tweak, often done via a barrel adjuster on the derailleur or shifter.
If a single click repeatedly fails to result in a smooth shift, the Cannondale manual advises taking the bike to a dealer. This often points to a bent derailleur hanger, the thin metal piece that holds the rear derailleur to the frame. It’s designed to bend in a crash to save the more expensive derailleur, but even a minor impact can knock it out of alignment. A misaligned hanger means the derailleur can’t travel in a straight line parallel to the cassette, making precise shifting impossible.
Keeping your bicycle chain oil clean and lubed also directly impacts shift quality. A dry, gritty chain adds friction and noise, making every shift feel rougher than it needs to be.
Shifting on Different Bike Types
The standard procedure applies to road bikes, mountain bikes, and hybrids with traditional derailleurs. Two other systems have their own rules.
Single-Speed or Fixed-Gear Bikes: No shifters. Your cadence is your only variable. You brake for hills and spin for descents.
Internal Gear Hubs (e.g., Shimano Nexus, Alfine): The shifter, usually on the right handlebar, controls a gear mechanism sealed inside the rear hub. The huge advantage is the ability to shift while stopped, perfect for city riding. The technique changes: you must completely stop pedaling for a second when shifting an internal hub. Pedaling under load during the shift can damage the internal planetary gears.
Electronic Shifting (e.g., Shimano Di2, SRAM eTap): The technique is identical to mechanical shifting, but the execution is servo-motor perfect every time. You still need to ease pressure, but the system is more tolerant and can even trim the front derailleur automatically to prevent chain rub.
Before You Go
Shifting well is about using the right gear to keep your legs spinning comfortably. Remember the three mechanical guardrails: always pedal forward, ease up for the front derailleur, and avoid the extreme cross-chained gears.Listen for the grinding noise of a bad chain line, and feel for the crispness of a well-tuned cable. Your first tune-up at that 60-mile mark will make more difference than any technique tip. Now go find a hill with a long, steady grade and practice that front shift from the big ring to the small one, easing your pressure just before the click. That’s the moment it becomes instinct.
Frequently Asked Questions
Can I shift gears while standing still?
No. The derailleur can only guide the chain sideways when it is moving forward. If you click the shifter while stopped, the mechanism will move, but the chain will not shift until you start pedaling forward, often resulting in a loud, jarring shift.
Why does my chain make noise in some gears?
Persistent noise in specific gear combinations, especially when the chain is on the smallest chainring and smaller cogs, is almost certainly chain rub against the front derailleur cage. This is caused by cross-chaining. Shift to a larger chainring or a larger rear cog to straighten the chain line and eliminate the rub.
How do I know when my bike needs a gear adjustment?
Signs include hesitant shifts that require multiple clicks, the chain skipping over a cog after a shift, or a constant rubbing noise that doesn’t go away when you straighten the chain line. These often point to cable stretch or a misaligned derailleur hanger.
Is it bad to pedal backwards on a bike?
Pedaling backwards on a freewheel bike is generally fine for coasting or positioning your pedals. However, you must never pedal backwards immediately after clicking the shifter, as the chain can jam. Some internal gear hubs also prohibit backpedaling during a shift.
What’s more important for smooth shifting: technique or maintenance?
They’re a loop. Perfect technique won’t fix a bent derailleur hanger or a stretched cable. But even a perfectly tuned bike will shift poorly if you mash the pedals during a front shift. Start with a mechanically sound bike, then apply good technique. The maintenance interval in your manual, like the 60-mile check, is your foundation.
