
Are 2 Inch Wheel Spacers Safe? The Legal & Mechanical Facts
This post contains affiliate links. As an Amazon Associate, we earn from qualifying purchases.
Two-inch wheel spacers are safe only under a strict, three-part test: the spacer must be hub-centric and bolt-on, correctly installed with extended hardware and adequate thread engagement, and legally compliant with local track-width increase limits. Fail any point, and you risk losing a wheel, a fine, or your insurance coverage.
The 50mm of added distance isn’t just a cosmetic change. It multiplies leverage on your suspension and drivetrain, turning a wrong part into a guaranteed failure. This guide maps out the specific thresholds, thread revolutions, track width limits, material grades, that separate a safe stance from a rolling liability.
What follows: the precise thread specs from manufacturer guides, the Australian legal stance that often bans them outright, the physical mechanism behind bearing overload, and what to do if your inspection is coming up. We’ll also name the two spacer types that don’t belong on any road-going vehicle.
Key Takeaways
- In Australia, NSW VSI No. 9 explicitly prohibits aftermarket wheel spacers unless factory-fitted, making them a legal liability for most road users.
- The critical safety spec is thread engagement: for a common M12x1.5 stud, you need at least 6.5 full revolutions (about 10mm) of bolt thread inside the hub.
- Hub-centric, bolt-on spacers with their own integrated studs (like the Eibach Pro-Spacer) are the only design that safely handles the 50mm leverage of a 2-inch spacer.
- Adding 2 inches of offset increases the load on your wheel bearings by an estimated 30-40%, a quantifiable wear factor that shortens component life.
- Insurance companies can and will deny claims if an accident investigation links the cause to non-compliant, unapproved modifications like spacers.
The Three-Part Safety Test for 2-Inch Spacers
Safety isn’t a yes-or-no question. It’s a checklist. A 2-inch spacer passes only if it satisfies all three of these mechanical and legal criteria.
1. Hub-Centric & Bolt-On: No Exceptions
For any spacer over 1/4 inch (about 6mm), a hub-centric, bolt-on design is mandatory. This isn’t a preference.
A hub-centric spacer has a center bore machined to match your vehicle’s hub exactly. The spacer’s outer lip then centers your wheel. The hub carries the vehicle’s weight, exactly as the factory intended. The wheel studs or bolts provide clamping force, not structural support.
A bolt-on spacer is a thick disc that bolts directly to your hub using its own integrated studs or bolts. Your wheel then mounts to these new studs. This preserves, or even increases, the total available thread engagement for the wheel nuts, which is the single most critical safety factor.
Where this goes sideways: Using a “slip-on” spacer, a flat plate that slides over your factory studs, for a 2-inch application. This eats into the available thread length for your wheel nuts. If your factory stud only had 12mm of thread and you add a 50mm spacer, your wheel nut has nothing to grip. The result is often three or four turns of engagement, a vibration that starts within 100 miles, and a wheel that can detach under cornering load.
The Eibach Pro-Spacer system is a benchmark for this design. Its installation instructions are clear: the system uses special nuts to mount to the hub, and the integrated studs are “optimized for your vehicle’s original wheels.”
For a flush look without a spacer’s added interface, a wheel with the correct negative offset is the engineered solution. It changes the stance from within the wheel itself.
2. Thread Engagement: The Make-or-Break Spec
This is the number that matters more than brand, price, or material. Thread engagement is the length of bolt thread that actually grips inside the hub or spacer.
The NSW government guideline and manufacturer specs like those from H&R Springs provide the hard numbers. They don’t just say “use longer bolts.” They specify the minimum revolutions.
| Thread Size | Minimum Revolutions | Minimum Support Length |
|---|---|---|
| M12 x 1.25 | 8.0 revolutions | ≈ 10 mm |
| M12 x 1.5 | 6.5 revolutions | ≈ 10 mm |
| M12 x 1.75 | 6.5 revolutions | ≈ 12 mm |
| M14 x 1.5 | 7.5 revolutions | ≈ 11 mm |
These figures are not suggestions. They are the calculated threshold where the clamping force is distributed safely across the threads. Fewer turns concentrate stress, which leads to thread stripping under the high cyclic loads of driving.
The process is simple but non-negotiable: 1. Install the spacer onto the clean, bare hub. 2. Hand-thread one of your original wheel bolts or the new extended bolt into the stud. 3. Count how many smooth, full rotations it takes before the bolt head seats against the wheel. 4. If you get fewer revolutions than the table specifies, you need longer studs or a different spacer design.
Skipping this check is how you trust your safety to a guess.
3. Legal Compliance: It’s Not Just About Fit
You can have the perfect mechanical installation and still be driving an illegal, uninsurable vehicle. Legal compliance operates on a separate axis from mechanical safety.
In Australia, the NSW Vehicle Standards Information (VSI) No. 9 is the canonical reference. Its stance is unambiguous: “Wheel spacers or adaptors must not be used for wheel conversions between the wheel mounting face and the wheels unless fitted as original equipment by the vehicle manufacturer.”
That’s a direct, primary-source prohibition for aftermarket use on most road cars.
The regulation also sets hard limits on track width increase, which is exactly what a spacer does. For passenger cars, the track must not increase by more than 25mm. For off-road 4WDs and goods vehicles, the limit is 50mm. A 2-inch (50.8mm) spacer pushes a 4WD over the legal edge by the thickness of a credit card.
The part nobody mentions: Even if a spacer keeps you within the track-width limit, the NSW rule’s opening clause, “unless fitted as original equipment”, often renders the entire modification non-compliant from the start. This legal nuance is what catches owners out during a rego inspection or after an accident.
The 50mm Leverage Problem: Physics You Can’t Ignore
Moving the centerline of your wheel outward by two inches doesn’t just change the look. It changes the fundamental leverage applied to several wear items. The forces are not linear; they multiply.
Think of your wheel bearing as a pry bar’s fulcrum. The tire’s contact patch is the point where you apply force. Pushing the tire out 50mm lengthens that pry bar. The same cornering force now creates a much larger twisting moment on the bearing.
Industry estimates, echoed in engineering analyses, suggest this increases bearing load by 30-40%. The bearing will run hotter and wear out faster. The failure might not be sudden; it manifests as a progressive growl or play in the wheel that appears 20,000 miles earlier than expected.
The same leverage principle applies to your suspension bushings, ball joints, and even the steering rack. The system was calibrated for a specific scrub radius and kingpin offset. A 2-inch spacer throws those calculations out. You might feel it as heavier steering, increased bump steer over rough roads, or accelerated wear on the inner edges of your front tires.
Common mistake: Installing spacers only on the front axle of a front-wheel-drive car to clear aftermarket brakes. This asymmetrically alters the steering geometry and scrub radius, often leading to a persistent, unsettling pull under braking. The fix is either a full axle set or a different clearance solution.
The Legal & Insurance Reality (Australia-Specific)
For Australian drivers, this is the section that decides whether the mod stays on or comes off before your next pink slip.
The legal landscape is defined by state-based Vehicle Standards, with NSW VSI No. 9 being a widely referenced model. Its prohibition is clear. Other states have similar engineering principles, even if the wording differs. The onus is on the vehicle owner to prove compliance, not on the inspector to prove otherwise.
Insurance is the second layer of risk. When you file a claim, the assessor’s job is to determine if any modification contributed to the incident. Non-compliant wheel spacers are a red flag.
If your spacers caused a wheel to detach or altered the handling enough to contribute to a loss of control, your claim will likely be denied. Even if the spacer wasn’t the direct cause, the mere presence of an unapproved modification gives the insurer grounds to argue you breached your policy’s terms. The official NSW vehicle standards guideline is the document they will cite.
Your practical, road-going choices are therefore limited: 1. Avoid spacers entirely. Select aftermarket wheels with the offset that gives you the stance or clearance you need. This is the most compliant path. 2. Seek formal engineering certification. If you must run spacers (e.g., for dedicated track wheels), a licensed certifier can assess and certify the modification under the relevant code. This is expensive and time-consuming, and it’s only for genuine edge cases, not cosmetic stance. 3. Understand the risk. If you proceed without compliance, you accept the financial and legal liability for any defect notice, failed inspection, or denied insurance claim.
Installation: The Five-Step, No-Shortcuts Process
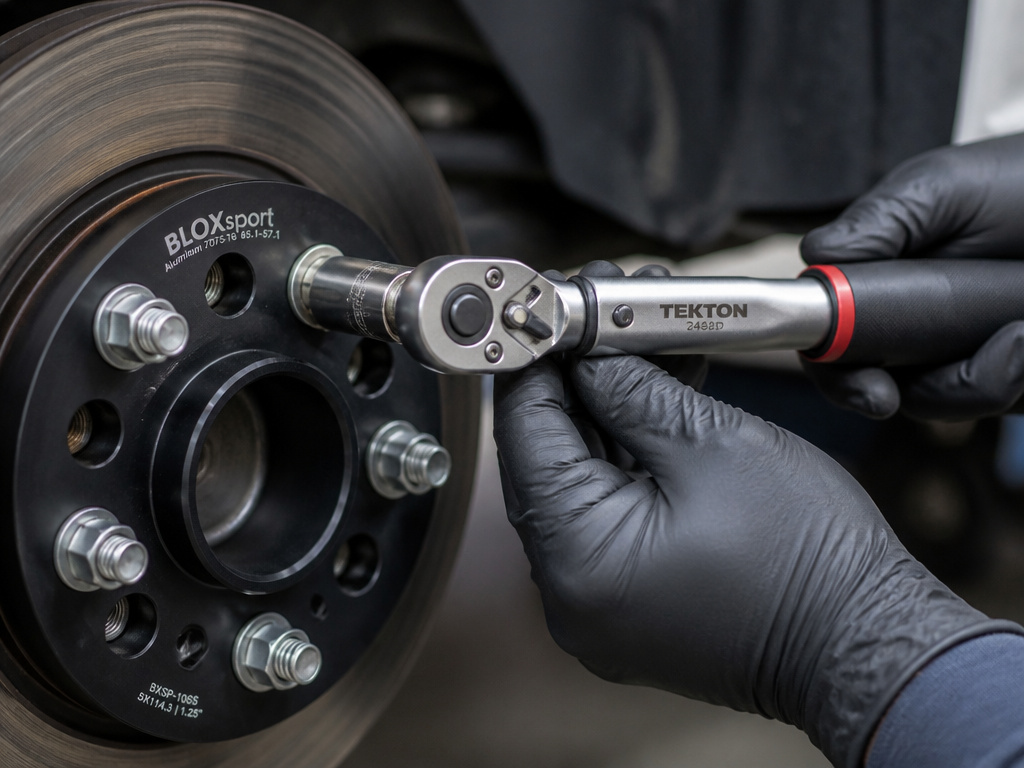 If you’ve passed the legal hurdle and have the correct hub-centric, bolt-on spacers, installation is your final gatekeeper. Rushing it voids every safety check you just did.
- Clean Every Surface. The hub face, the back of the spacer, and the wheel mounting surface must be free of rust, dirt, and old paint. A wire brush and brake cleaner work. Any debris creates runout, which translates to a vibration you cannot balance out.
- Dry-Fit and Measure Thread Engagement. Before final assembly, mock up the spacer and wheel with one bolt. Count the revolutions as described earlier. Confirm you meet or exceed the spec for your thread size.
- Use a Torque Wrench. Always. Tighten the spacer-to-hub bolts in a star pattern to the vehicle manufacturer’s specified torque for wheel bolts. Then, mount the wheel and torque the wheel-to-spacer nuts in a star pattern to the same spec. Never use an impact gun for final tightening, it can overstress threads or hide a false seat.
- Apply the Correct Lubricant. Some kits, like the TECHART spacer sets, specify a particular aluminum grease (they list part number 997.900.999.999) to prevent galvanic corrosion between the aluminum spacer and the steel hub. If your kit includes a specific anti-seize, use it. If it doesn’t, a thin layer of quality aluminum-based anti-seize on the hub face is a good practice.
- Re-Torque After 50-100 km. This is not optional. Settling and thermal cycling will loosen fasteners. Drive moderately, then re-check the torque on every wheel nut. Mark them with a paint pen so you can see if they move later.
Skipping step five is the most common post-installation failure. The first heat cycle and road vibration work everything in.
What About Smaller Spacers? The 1-Inch Alternative
If the legal and mechanical hurdles for 2-inch spacers seem too high, a smaller spacer might be a viable compromise. The physics are simpler, and the legal risk is often lower.
Smaller wheel spacers, like a 1-inch (25mm) hub-centric set, reduce the leverage increase and are more likely to keep you within the 25mm passenger car track-width limit. They still require extended hardware and proper installation, but the load on bearings and studs is proportionally less severe.
For very minor clearance issues, 1/4-inch wheel spacers (about 6mm) exist. At this thickness, high-quality slip-on designs can be acceptable because they reduce thread engagement by a negligible amount. They solve problems like aftermarket wheel centering or clearing a slight suspension contact, not a styling deficit.
The principle is the same: hub-centric is always safer than lug-centric, and thread engagement is the king metric.
Frequently Asked Questions
Can 2-inch spacers cause vibration?
Yes, almost always if they are not hub-centric or not installed on a perfectly clean surface. A lug-centric spacer relies on the clamping force of the nuts to center the wheel, which is inherently less precise. Any tiny imbalance is magnified by the 50mm lever arm, creating a harmonic vibration felt in the steering wheel or seat.
Do I need an alignment after installing wheel spacers?
Yes. Pushing the wheels out changes the scrub radius and can induce changes in toe and camber angles. You need a full wheel alignment after installation to prevent rapid, uneven tire wear and to restore correct steering feel.
Are wheel spacers safe for towing?
No. Towing adds significant lateral and vertical loads to the suspension and wheel attachments. Adding a 2-inch spacer’s leverage to an already stressed system is asking for a fatigue failure in a stud, hub, or bearing. No reputable manufacturer recommends spacers for towing applications.
What’s the difference between wheel spacers and wheel adapters?
Wheel spacers are a constant-thickness disc that changes offset. Wheel adapters change the bolt pattern (e.g., from 5×114.3 to 5×120) and often incorporate a thickness offset. Adapters introduce even more complexity and potential failure points, and they face the same, if not stricter, legal prohibitions. The safety and legality of wheel adapters for trucks or cars is a separate, even more contentious discussion.
How do I know if my spacers are hub-centric?
Hub-centric spacer will have a machined lip on its outer diameter that the wheel center bore fits snugly over. The spacer itself will also have a precise inner bore diameter (e.g., 66.1mm for a BMW). If it’s just a flat plate with holes, it’s lug-centric. When shopping, look for product listings that specify “hub-centric” and list your exact vehicle make, model, and year.
The Bottom Line
The question isn’t really “are 2 inch wheel spacers safe?” A better question is “are they safe, legal, and insurable for my car, where I drive?” For most Australian owners of road-going vehicles, the answer is a firm no, based on the NSW VSI No. 9 prohibition.
If you’re building a dedicated track car and can engineer the solution, or if you live in a region with more permissive laws, safety boils down to an uncompromising checklist: hub-centric bolt-on design, verified thread engagement, flawless installation, and a post-drive re-torque. The moment you skip one, you’re betting your safety on luck.
For the look without the liability, the engineered path is different wheels. The time and money you spend finding a wheel with the right offset is less than the cost of a single failed inspection or a set of ruined wheel bearings. Your mechanic will thank you, and your insurer won’t have a reason to walk away.
