
How to Dewinterize an RV in Spring: Prevent Leaks & Damage
This post contains affiliate links. As an Amazon Associate, we earn from qualifying purchases.
To dewinterize your RV in spring, follow a four-step sequence: inspect the exterior and roof for winter damage, reactivate and test the plumbing and electrical systems, check all safety and mechanical components, then perform a final systems check before your first trip. Skipping any stage risks undetected leaks, dead batteries, or a dangerous propane situation on the road. The entire process for a standard travel trailer takes two to four hours if you work methodically.
That sequence is a physical workflow where you start at the top and work down to prevent a roof leak from dripping onto systems you’ve already checked.You pressurize the water system before you sanitize it because a leak under city pressure ruins your chlorine mix and your floor.
What follows: the exact chlorine solution ratio that works, the pump leak test that finds drips before they cause rot, the NHTSA stat on tire failures that changes how you look at your sidewalls, and the one interior seal everyone forgets.
Key Takeaways
- Work from the roof down. Inspect seals and the roof first, before you pressurize any interior system. A single missed seam leak can cause thousands in water damage.
- Sanitize your freshwater tank with a specific solution: ¼-cup of plain, unscented household bleach (5–6% sodium hypochlorite) per gallon of water. Use one gallon of this mix for every 15 gallons of tank capacity.
- Perform a pump leak test after flushing the antifreeze out. With all faucets closed and the water pump on, listen for cycling. If the pump kicks on by itself, you have a leak, find it before you add sanitizer or hit the road.
- Tire age matters more than tread sometimes. The National Highway Traffic Safety Administration (NHTSA) notes tire condition was a factor in hundreds of crashes. Tires over six years old are a serious risk, regardless of tread depth.
- Test every safety device. This includes the propane leak detector, carbon monoxide alarm, and smoke alarm. A detector older than ten years cannot be trusted and must be replaced.
The 4-Step Spring Dewinterization Sequence
Most guides give you a laundry list. That’s how steps get missed. Your RV is a system of layers, roof, walls, interior, chassis, and water flows down. The only logical method is top-down, outside-in.
Start with the shell. Any damage from ice, snow, or UV rays needs to be addressed before you introduce water and power inside. Then move to the habitable space: plumbing and electricity. Finally, handle the running gear, tires, brakes, lights, that gets you to the campground. This order protects your work. Fixing a roof seal after you’ve cleaned the interior just means cleaning again.
The part nobody mentions: A methodical top-down dewinterization for a standard travel trailer or Class C motorhome takes 2–4 hours. Larger Class A rigs with multiple slide-outs and a generator can take a full day. Rushing it guarantees a missed step.
Step 1: Exterior & Roof Inspection
Get on the roof. If your ladder feels unsafe, it is. Use proper footing and have a spotter. This is the most critical visual inspection of the year.
Look for cracks, bubbles, or gaps in the lap sealant around every roof penetration: vents, air conditioners, satellite dishes, and antenna bases. Sun and freeze-thaw cycles make this sealant brittle. Press on it with a plastic putty knife. If it’s hard and cracks, it’s failed. Fresh sealant should be pliable.
Check the sidewalls and window seals from the ground. Look for discolored or swollen siding, a sure sign of water intrusion behind it. Open and close every storage compartment door. Sticky latches are a sign of dirt or corrosion.
Lubricate all external locks and the rubber seals around the entry door and slide-outs with a pure silicone spray like CRC. Dry, cracked seals are the number one cause of slide-out leaks and drafts.
TL;DR: Roof first, then walls, then doors. Sealant and silicone are your best friends here.
Step 2: Interior Systems Reactivation
Now it’s safe to go inside. Your first jobs are the water and electricity that make the space livable.
Start with the 12-volt system. Reconnect your house batteries if you removed them. Check the voltage with a multimeter. Anything below 12.4 volts for a lead-acid or AGM battery means it sat discharged over winter and is likely damaged. Clean the terminals with a baking soda and water solution and a wire brush until they’re shiny. Corrosion is a silent killer of voltage.
Next, the plumbing. Locate your low-point drains and water heater bypass valves. Ensure all drain plugs are reinstalled and bypass valves are set to the normal position. Connect a fresh water hose to the city water inlet.
Before you start: Never use a garden hose that’s been lying around. It’s full of mold and bacteria. Use a dedicated, drinking-water-safe RV hose. Turn the water supply OFF at the spigot until you’re ready to pressurize the system.
Turn on the water pump. Open every single faucet, hot and cold sides, including the outdoor shower and toilet flush, until pink antifreeze is fully purged and clean water runs. This can take several minutes per faucet.
Step 3: Safety & Mechanical Checks
With the basics alive, verify the systems that keep you safe. This step is non-negotiable.
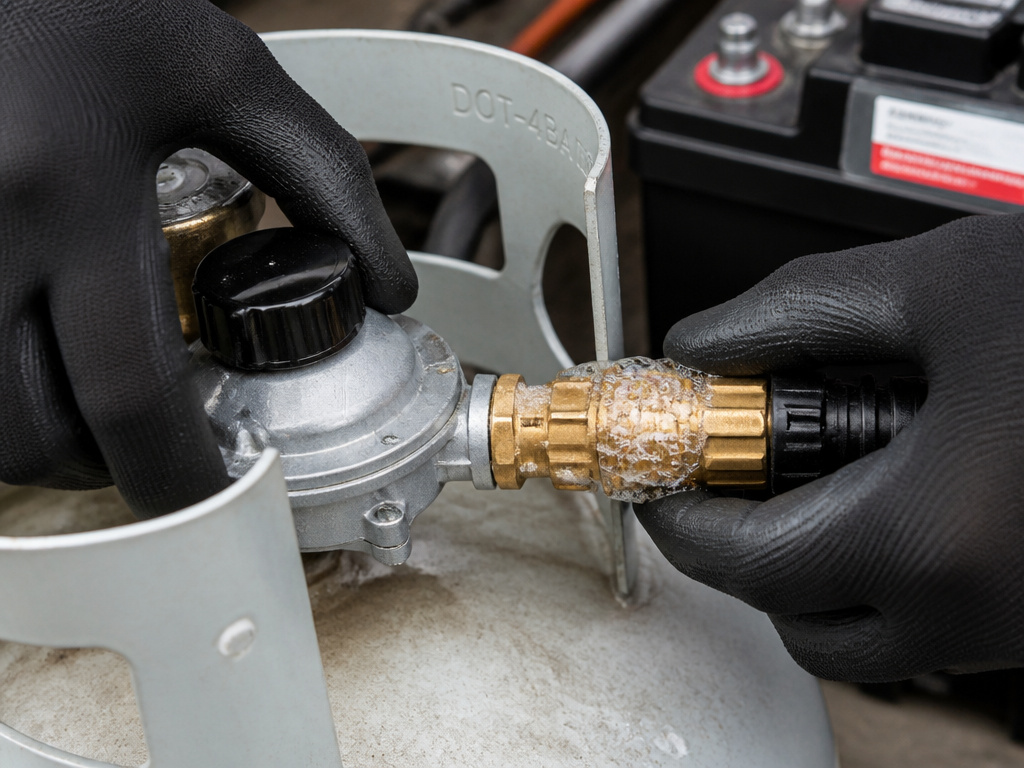
Turn on your propane at the tank. Mix dish soap and water in a spray bottle. Spray every propane fitting you can access: at the tank regulator, the line to the water heater, the stove connections, and the furnace. Look for bubbles. If you see them, turn off the gas immediately and tighten the fitting carefully. Do not over-tighten brass fittings.
Test your propane leak detector, smoke alarm, and carbon monoxide alarm. Press the test button. If a detector is over ten years old, replace it. The sensor inside expires.
Go outside for the mechanical check. This is where that NHTSA data gets real. The administration reported tire condition was a contributing factor in hundreds of crashes. Your tires might look fine, but age kills them.
| Check | What to Look For | Consequence If Skipped |
|---|---|---|
| Tire Tread & Sidewalls | Cracks, weather-checking, bulges, uneven wear. | Increased blowout risk, especially at highway speed. |
| Tire Date Code | The last 4 digits of the DOT code (e.g., “2523” is week 25 of 2023). | Driving on tires >6 years old drastically raises failure odds. |
| Tire Pressure | Use a quality gauge, check when tires are cold. | Underinflation causes overheating and tread separation. |
| All Exterior Lights | Headlights, brake lights, turn signals, marker lights. | A ticket, or worse, a rear-end collision. |
Check your TPMS sensor display if you have one. A dead sensor won’t warn you of a slow leak. If a sensor is faulty, know that you can replace a tire sensor yourself with a basic tool kit, saving a trip to the shop.
Step 4: Final Systems Verification & Sanitization
You’ve checked for big problems. Now, make the water drinkable and do a loaded test.
This is the pump leak test. With all faucets closed and the water pump switched on, listen. The pump should pressurize the system and then shut off. If it cycles on again after 30 seconds without you using water, you have a leak. Find it. Check under sinks, around the toilet base, and at the water heater.
Once the system holds pressure, sanitize the freshwater tank. 1. Mix the solution: ¼-cup plain, unscented bleach (5–6% sodium hypochlorite) with one gallon of water. 2. Pour one gallon of this mix into your fresh tank for every 15 gallons of tank capacity. 3. Fill the rest of the tank with fresh water. 4. Turn the pump on and run every faucet until you smell chlorine. 5. Let it sit for at least 4 hours, preferably overnight. 6. Drain the entire tank and refill with fresh water. Run the faucets until the chlorine smell is gone.
Finally, perform a loaded test. Fire up the generator if you have one. Turn on the air conditioner for 15 minutes. Run the furnace and the refrigerator on both propane and electric modes. Cycle the slide-outs in and out. This verifies everything works under real-world conditions.
Freshwater System: Flush, Pressurize, Sanitize
The plumbing network is the heart of your RV’s livability. It’s also the most vulnerable to winter damage and bacterial growth. Treat it with a surgeon’s precision.
Flushing moves stagnant water from every dead leg in the system, starting with the cold lines and then the hot.Don’t forget the toilet’s flush mechanism and the outdoor shower, these are common spots for leftover antifreeze to hide, which tastes terrible and can upset your stomach.
The pump leak test is your best diagnostic tool. A cycling pump indicates a leak, but a small drip might not make noise. After the test, get down on the floor with a flashlight. Look for moisture under the sinks, around the water pump, and at the back of the water heater. A small piece of dry toilet paper placed on a fitting will wick moisture and show a pink stain from residual antifreeze, revealing a slow leak you’d otherwise miss.
I prefer the overnight sanitization method. Letting the chlorine solution sit for 12 hours guarantees it kills everything in the tank and the long stretches of PEX tubing. The few extra hours prevent a musty taste that can linger all season.
Sanitizing is chemistry, not guesswork. That ¼-cup per gallon ratio targets a concentration strong enough to kill bacteria and mold but weak enough to be fully flushed out. Using scented bleach or a splash of “whatever” leaves chemical tastes and can damage rubber seals in your faucet cartridges.
Holding Tanks & Drains: Beyond the Flush
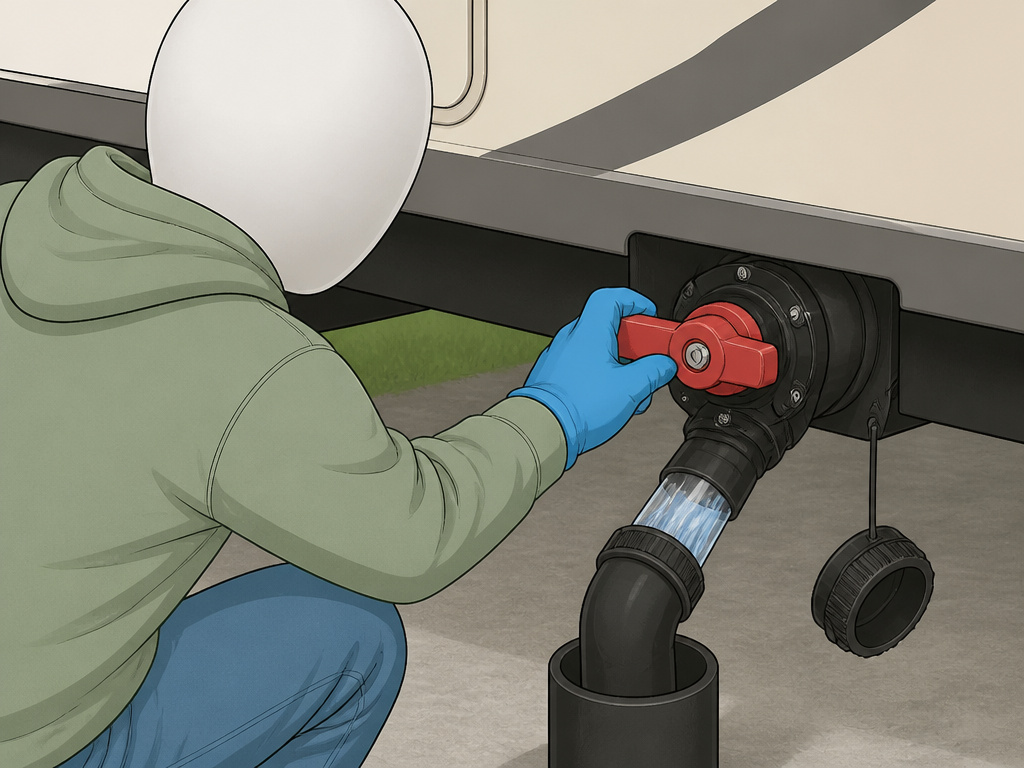 Your black and grey tanks sat all winter. Even if they were empty, residue coats the walls and sensor probes. A smelly tank ruins a trip faster than a flat tire.
The goal is to break down the waste and biofilm that cause odor. The Bio-Geo method cited in the research is a proven approach: it uses common bacteria-friendly treatments to digest the sludge, rather than just perfuming it.
Start by giving both tanks a thorough rinse with a dedicated tank flush port or a wand through the toilet. Then, add your preferred tank treatment along with several gallons of fresh water. Drive to the dump station if you can, the sloshing motion helps scrub the tank walls. This is also the time to check that your tank valves open and close smoothly. A stiff valve is a pre-failure warning.
For grey tanks, grease is the enemy. Run hot water with a grease-cutting dish soap down the kitchen sink periodically. Keeping your carburetor cleaner in the garage is wise, but for tanks, you need biology, not harsh solvents.
Electrical & Propane: The Silent Safety Check
 These systems have no moving parts until they fail catastrophically. Your inspection is pre-emptive.
For batteries, voltage is just the first clue. Clean terminals are arguably more important. Corrosion builds up as a white, blue, or green powder. It creates resistance, which makes your converter work harder and drains power. The baking soda and water mix neutralizes the acid. A terminal brush cleans the post; a wire brush cleans the cable clamp. After cleaning, a spray of battery terminal protector slows its return.
Where this goes sideways: Assuming a battery reading 12.6 volts is “good.” A battery can show full voltage but have no capacity under load, a condition called sulfation. The true test is watching voltage under load, like when the water pump runs. If it drops below 11.5 volts, the battery is weak.
Propane checks feel tedious. They are. You must check every joint. The most common leaks are at the stove quick-disconnect and the regulator tank connection. The soapy water test is foolproof. A steady stream of small bubbles means a leak. Turn the gas off and tighten the fitting a quarter-turn. Re-test. If it still leaks, you need a professional. Never ignore a propane leak.
Test your furnace and refrigerator on propane. Remove the exterior access cover and watch the ignition sequence. The flame should be a bright, steady blue. A lazy yellow or orange flame indicates incomplete combustion, which produces carbon monoxide. Shut it down and call for service.
The Exterior & Chassis: What You Can’t Miss
This is the final pass before you call the job done. It blends mechanical safety with preventative maintenance.
Tires deserve their own ritual. Pressure is critical, but so is the date. The rubber compounds dry out and oxidize from the inside. A six-year-old tire with full tread can still have sidewall belts ready to separate. Find the DOT code. If the last four digits read “1819” or older, start shopping for replacements. Underinflation is the other killer; it generates excess heat. Always set pressure based on your RV’s actual weight, not the sidewall max.
| Symptom | Likely Cause | Fix |
|---|---|---|
| Uneven tire wear on inner/outer edges | Chronic underinflation or misalignment. | Inflate to spec. If wear is severe, check alignment and consider if bad shocks cause tire wear. |
| Cupping or scalloped tread wear | Worn shock absorbers or suspension bushings. | Replace shocks and struts, then rotate tires. |
| Vibration at highway speed | Tire out of balance or a shifted belt. | Re-balance tires. If vibration remains, inspect for a belt separation. |
Lights are simple but vital. Walk around the RV with a helper. Have them press the brakes, hit the turn signals, and turn on the headlights. A burnt-out marker light is a fix you can do in five minutes with a replacement bulb from any auto parts store.
Lubricate everything that moves or seals. This includes window tracks, awning rollers, and the entry door hinge. For metal-on-metal parts like latch mechanisms, a dry Teflon spray is better than oily WD-40, which attracts dust. For the wheel bearings on a trailer, this is also the time to check for play. If there’s wobble, know that wheel bearings are a manageable job with a bearing packer and the right socket set.
Finally, give the whole rig a good wash. Getting winter grime off lets you see the paint and finish clearly. It’s also the last chance to spot any issues you missed.
Frequently Asked Questions
Can I dewinterize my RV myself?
Absolutely. Most dewinterization is straightforward DIY work requiring basic tools like a wrench set, a multimeter, and a tire pressure gauge. The key is following a methodical sequence and not rushing. Tasks requiring special equipment or gas work, like repairing a propane leak or repacking wheel bearings, are best left to a qualified RV technician.
How long does it take to dewinterize an RV?
For a standard travel trailer or Class C motorhome, plan for two to four hours of focused work. Larger Class A diesel pushers with multiple slide-outs, residential refrigerators, and a generator can take a full day. The time is in the inspection, not just the flushing.
Do I need to sanitize the water system every spring?
Yes. Stagnant water in tanks and lines over the winter allows bacteria and mold to grow. Sanitizing with a chlorine solution eliminates these contaminants and ensures your drinking water is safe and tastes fresh. It’s the baseline for a healthy water system all season.
What if I find a water leak during the pump test?
Stop. Find the leak before proceeding. Common locations are loose hose clamps under sinks, a faulty water pump connection, or a cracked fitting on the water heater. Tighten or replace the faulty component. If the leak is behind a wall or floor and you can’t access it, you need a professional repair. Water damage destroys RVs quickly.
My tires look fine but are 8 years old. Should I replace them?
Replace them. The National Highway Traffic Safety Administration data underscores that age is a critical failure factor. The rubber degrades internally from oxidation, losing its flexibility and strength. This makes it prone to sudden failure like a sidewall blowout, regardless of tread depth. Your safety isn’t worth the risk.
Is it okay to use a regular garden hose for my RV?
No. Standard garden hoses are not rated for potable water and can leach harmful chemicals like lead and BPA into your freshwater system. They also harbor mold. Always use a hose labeled “drinking water safe” or “RV water hose” that is made from non-toxic, antimicrobial materials.
Before You Go
Dewinterizing your RV isn’t a chore; it’s the first trip of the season. Doing it right means your first outing is about campfires, not crises. Remember the core four: inspect top-down, test for leaks before you sanitize, verify every safety device, and never trust an old tire.
Pack your tool kit with the essentials, silicone spray, a multimeter, a tire gauge, and you can handle 90% of what this process throws at you. Then hook up, check your lights, and go. The road is waiting.
